Created date: 16-03-23 | Updated date: 28-05-26 | Plugin version: 3.0.2 | API version: 100
Mastercard Gateway for Magento, OpenCart, PrestaShop and WooCommerce
Hosted Checkout Configuration
Here’s a detailed breakdown of each field in the Hosted Checkout section. This will help guide you through the setup process.
Enabling the “Hosted Checkout”
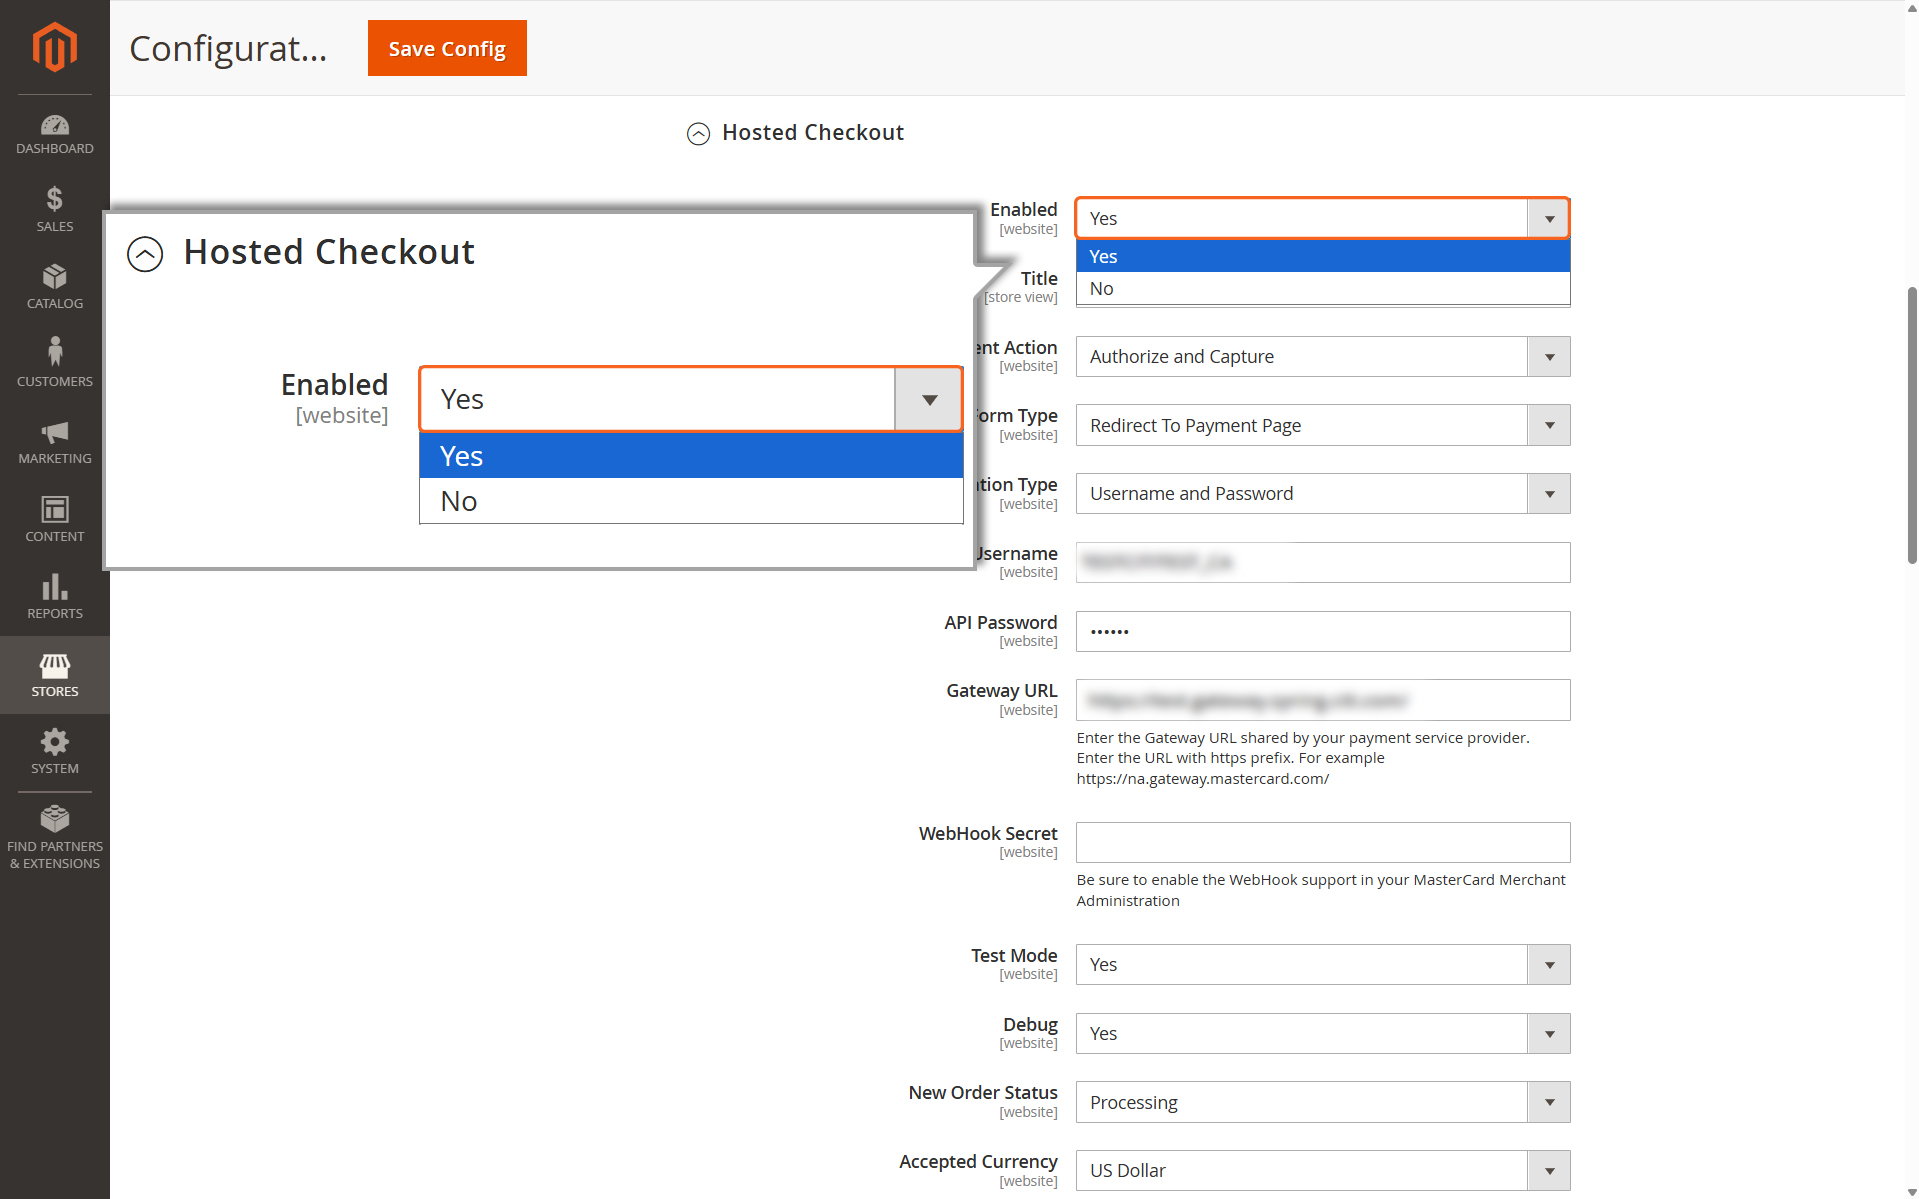
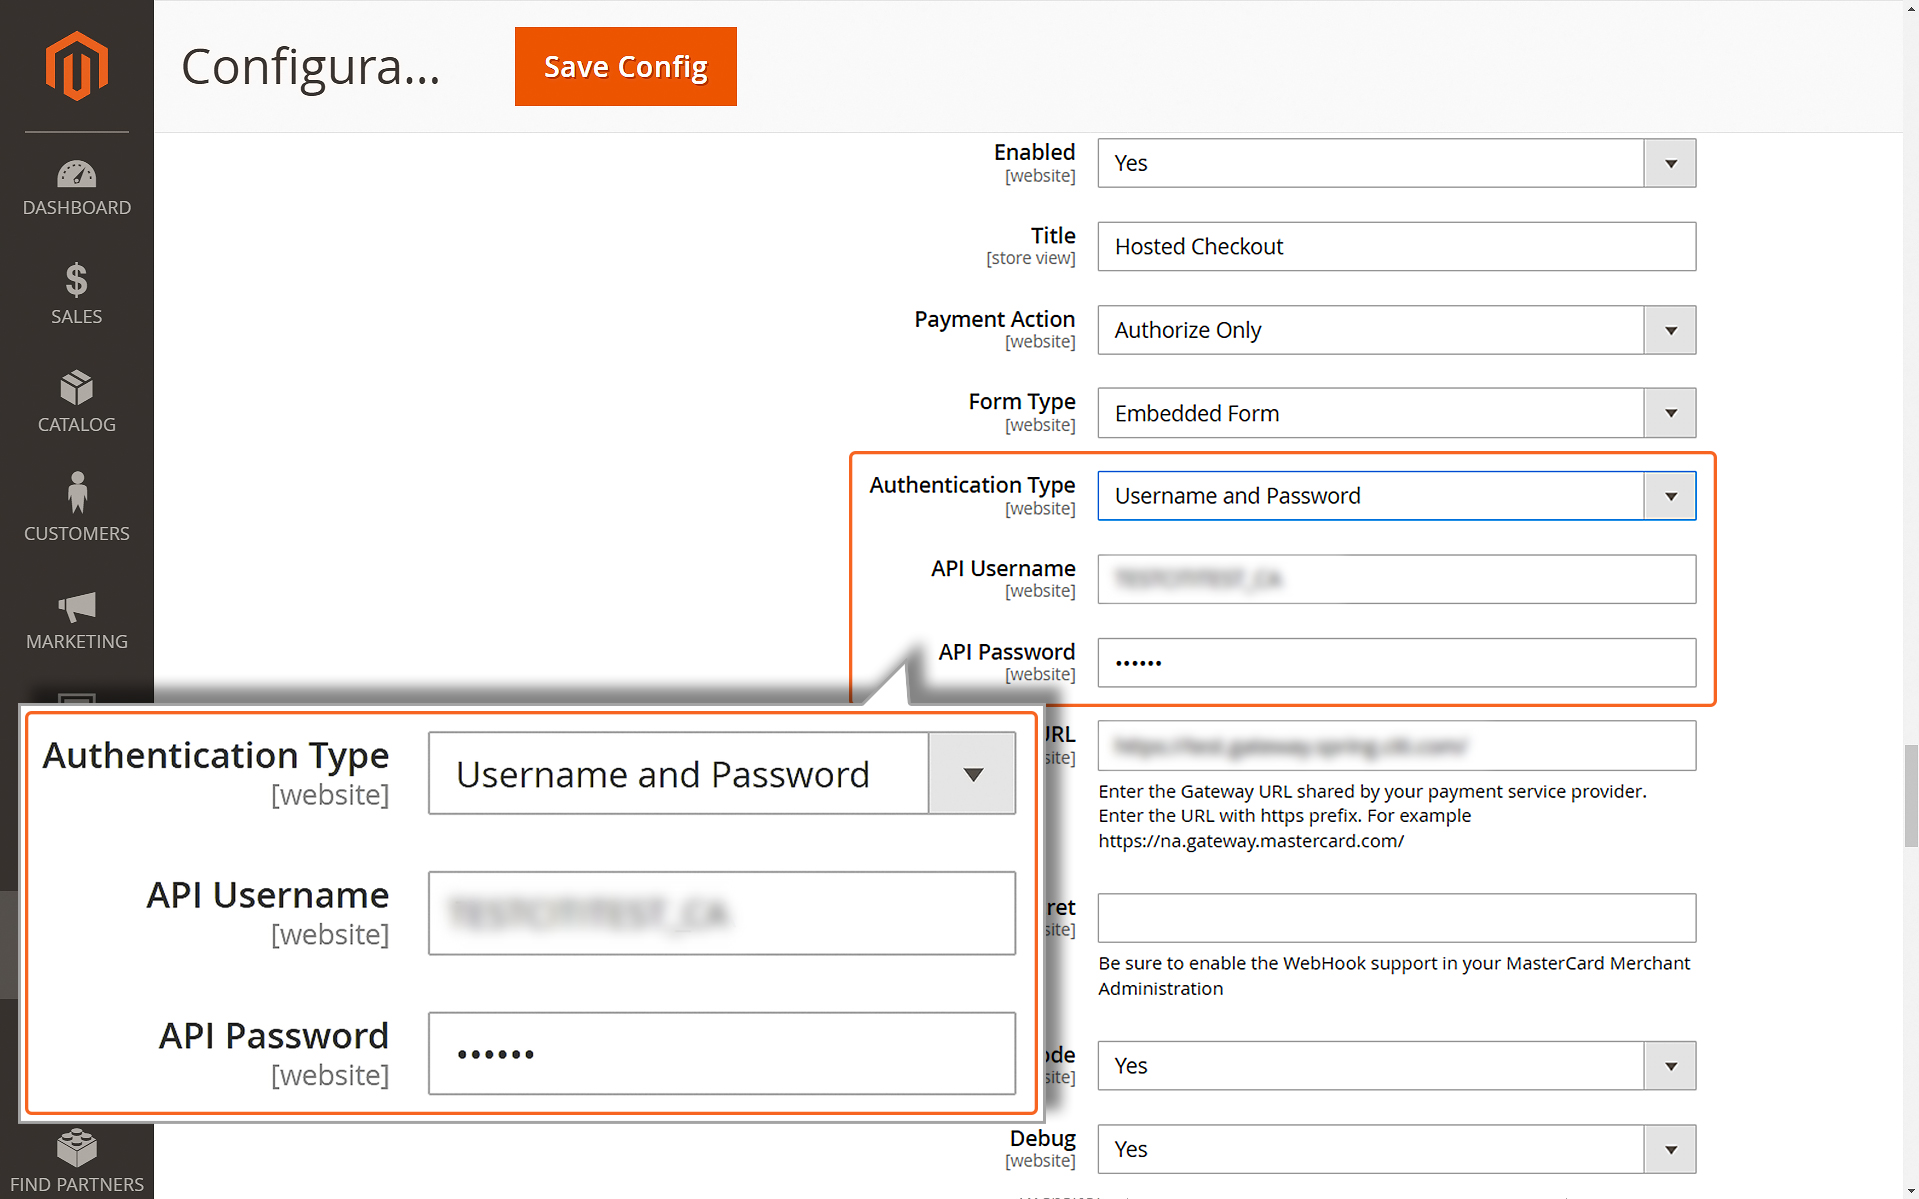
Enabled
Open the dropdown menu and select “Yes” to enable the Hosted Checkout feature. This step activates the configuration needed for this payment option as well as enables the same in the checkout page.
Adding “Title”
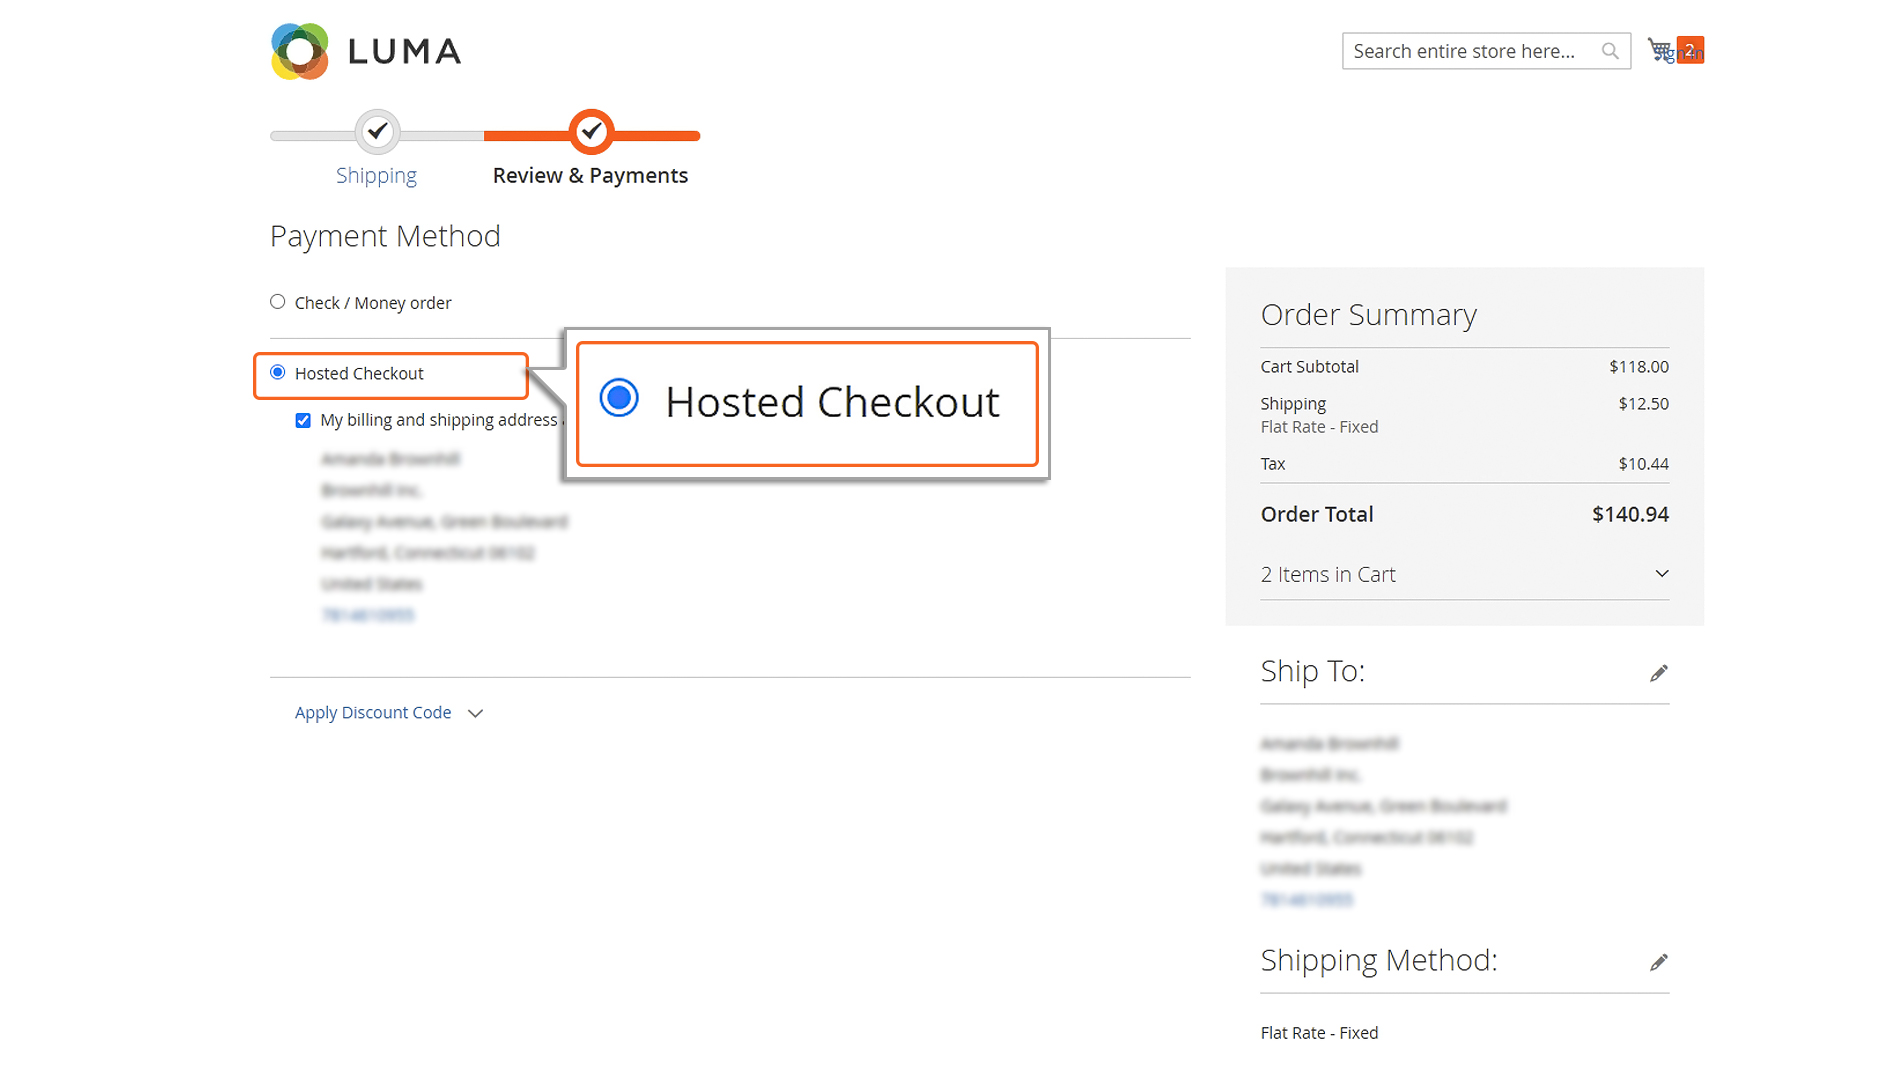
”Title” displayed Title displayed in Checkout page
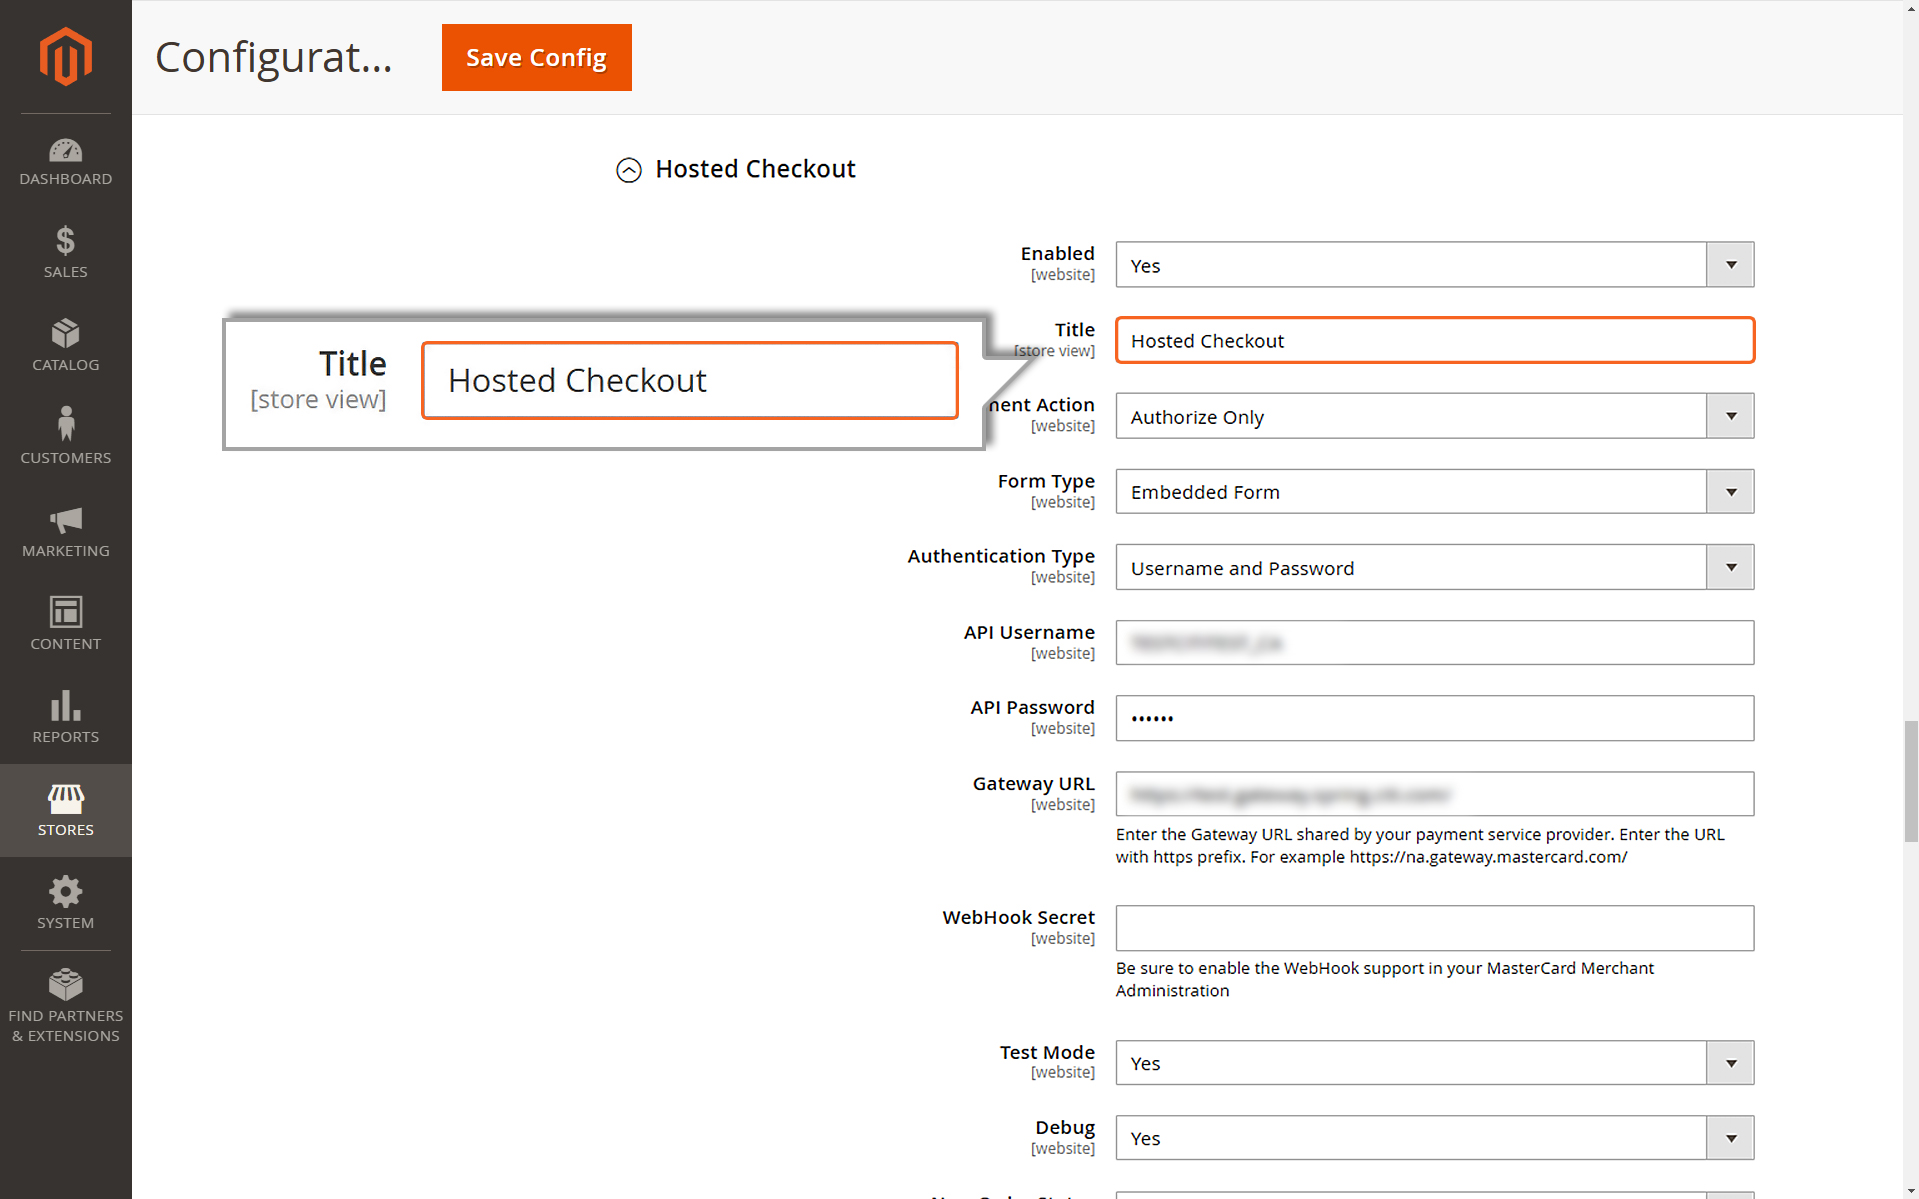
Title
Type in a name or label for this payment method. This is what your customers will see on the checkout page when choosing how to pay. Make sure the label is clear and easy to understand.
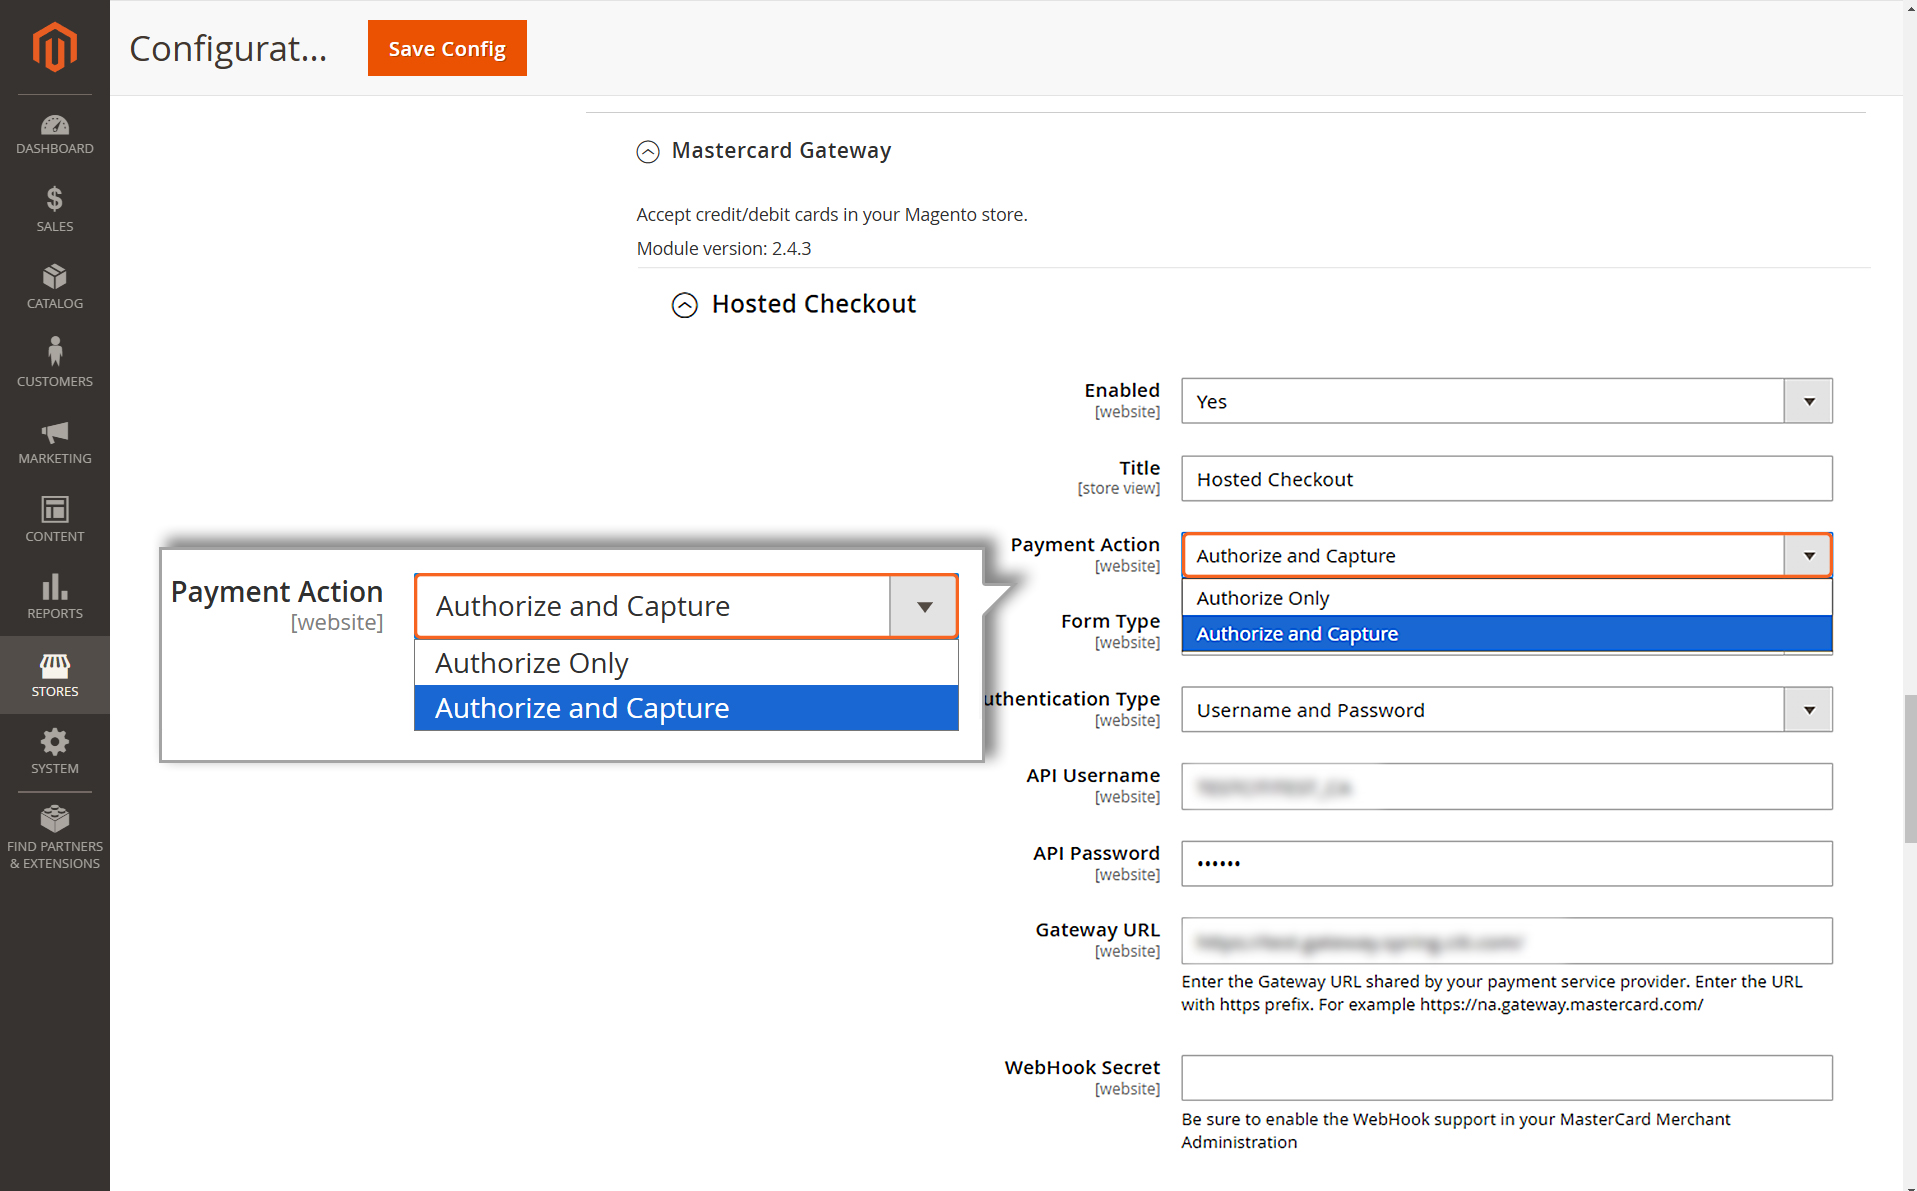
Payment Action
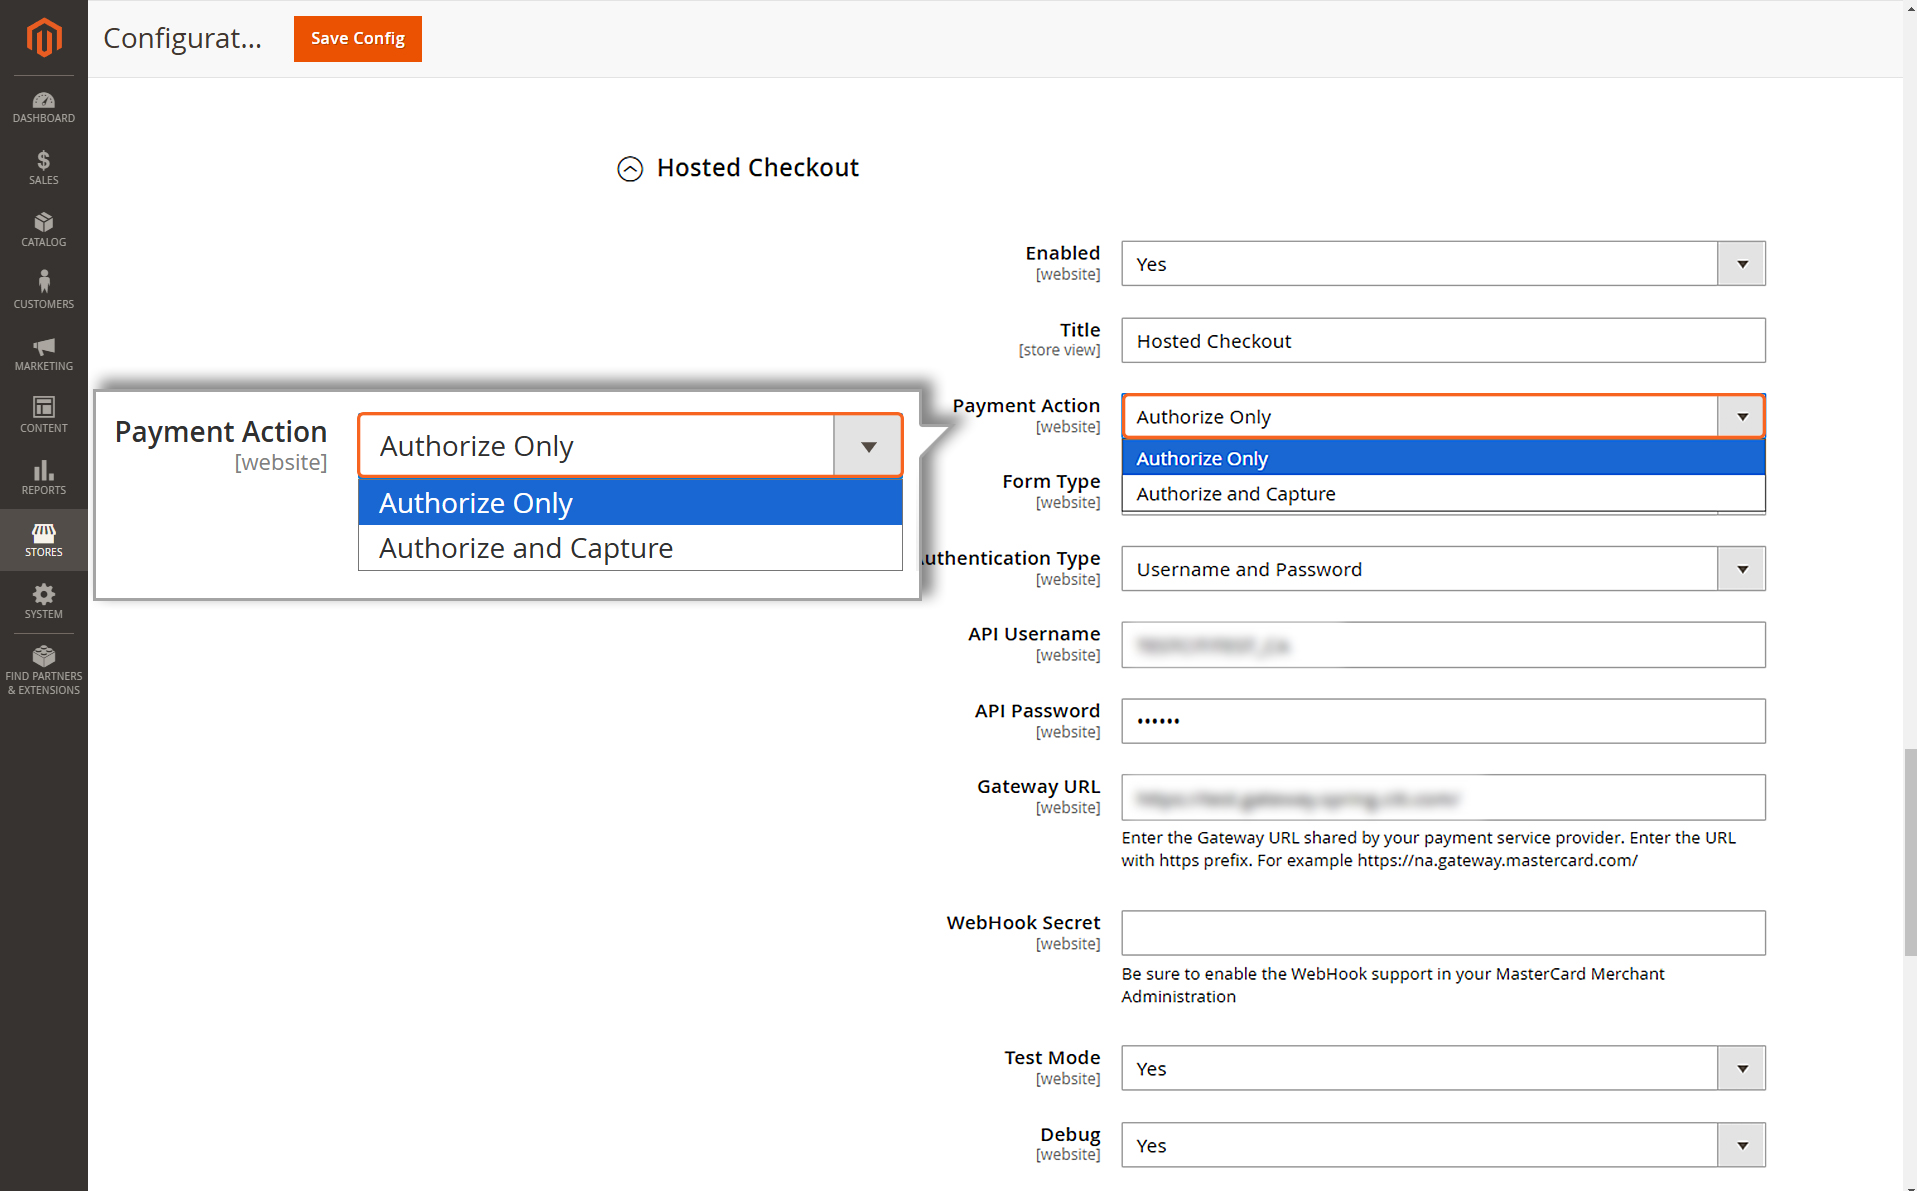
Choose one of the following payment flows.
Payment Action - Authorize Only
1. Authorize Only
If you choose “Payment Action” as Authorize Only, you will need to manually process the transaction to accept the payment. This means you must take an additional step to capture the payment amount.
The manual capture of funds is done through the Backend. Detailed instructions for this process can be found in the Managing Transactions section of this document.
The Authorize Only payment method works in two steps:
Authorization happens during checkout. This ensures the payment method is valid and reserves the funds.
Funds capture happens later. The money is only deducted after the merchant invoices the order.
This method gives you more control but requires you to complete the capture process manually within the stipulated timeframe configured for your MID.
Payment Action - Authorize & Capture
2. Authorize & Capture
If you choose the ‘Payment Action’ option as Authorize & Capture, the payment process will happen automatically. Here’s how it works:
When a user enters their card details and submits an order, the total amount of the order is immediately deducted from their card.
This amount is then automatically transferred to the merchant’s account.
Please note that while the transfer is automatic, it might take a little time for the amount to show up in the merchant’s account. However, no additional action is required from either the user or the merchant to complete the process.
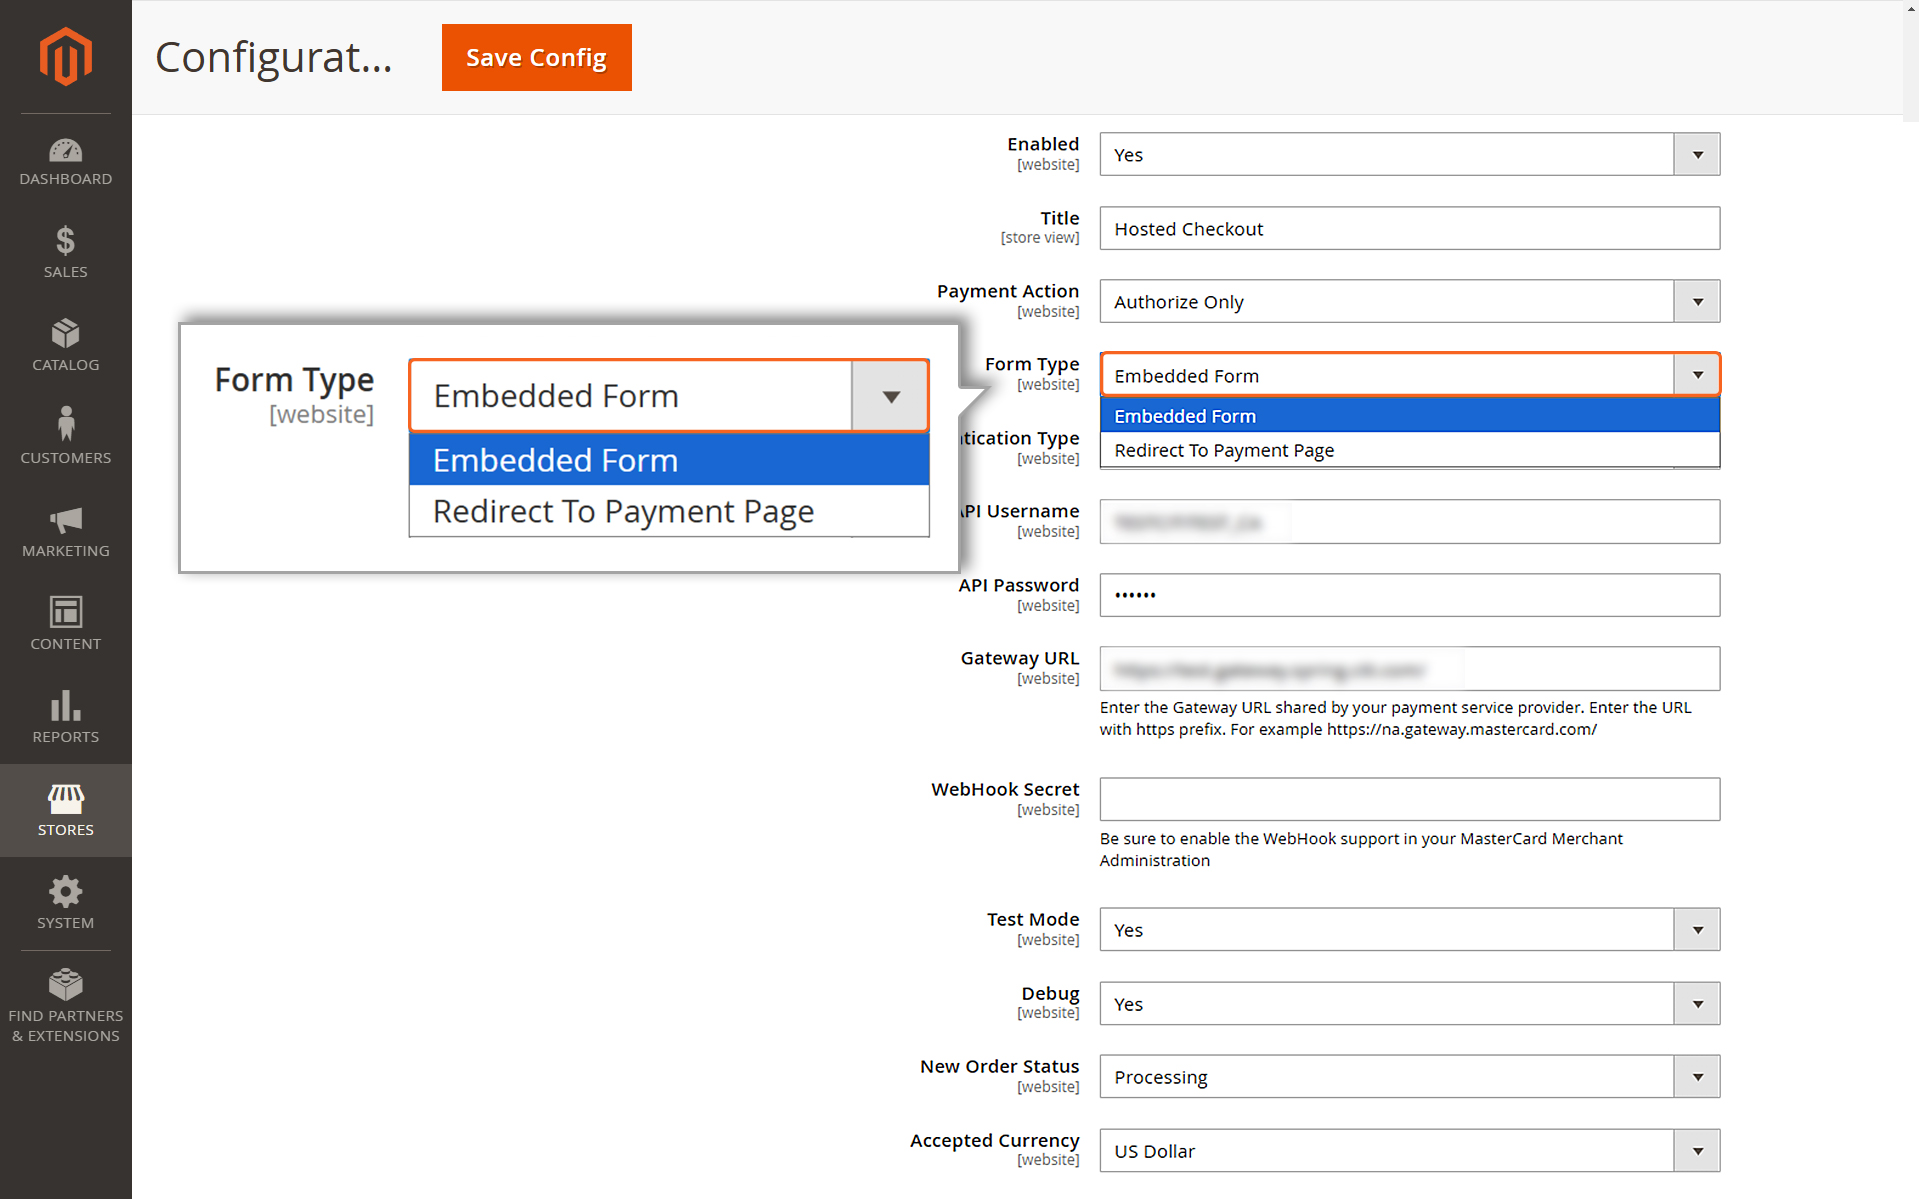
Form Type
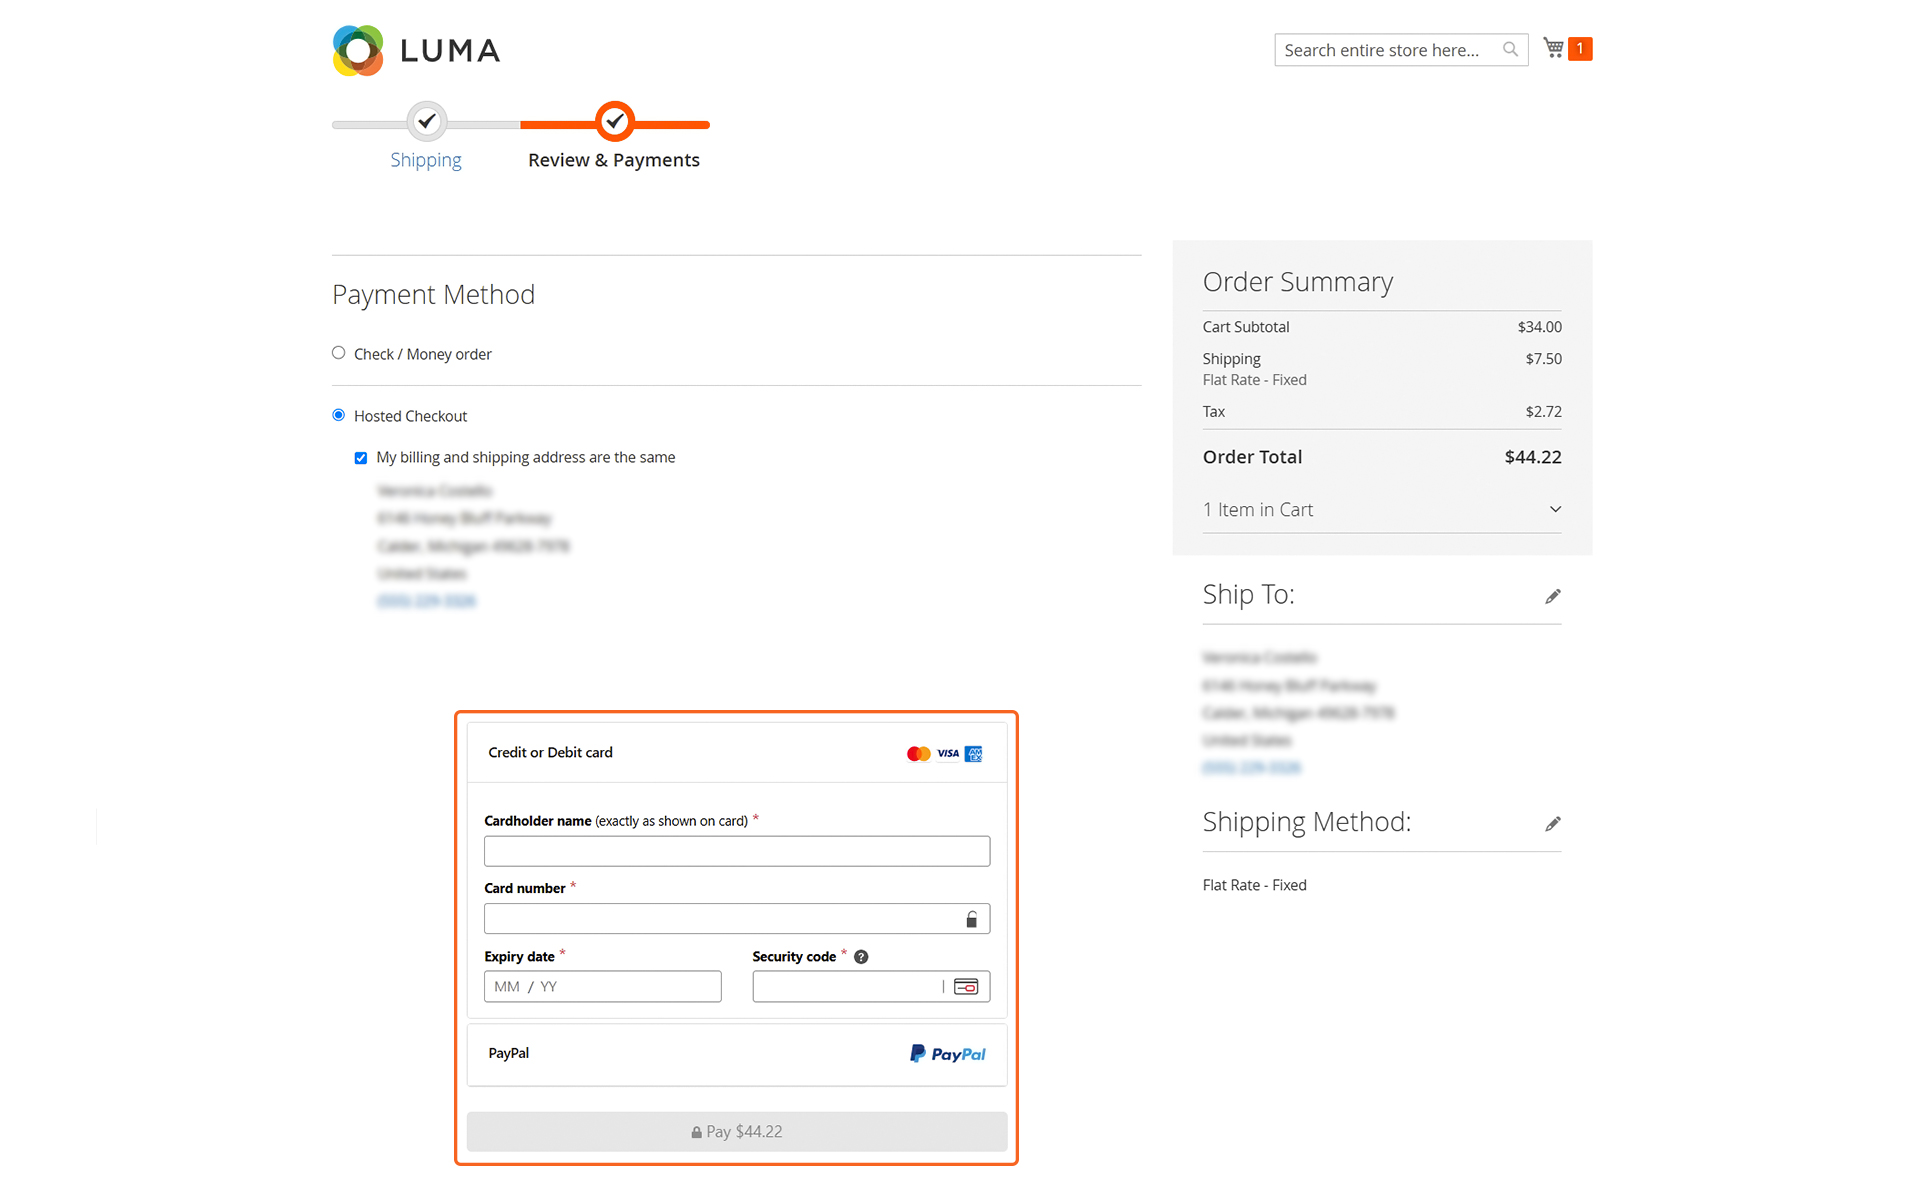
Form Type - Embedded Form
Embedded Form
Embedded Form: Customers enter card details directly on the checkout page.
Form Type - Redirect to Payment Page
Redirected Payment Page
Redirect to Payment Page: Customers are redirected to a secure Mastercard-hosted page to complete payment. Choosing “Redirect to Payment Page” will enable the Merchant Information section at the end of the plugin configuration page, allowing you to specify the information to be displayed on the redirected page.
API Password: Enter the API password obtained from your merchant account.
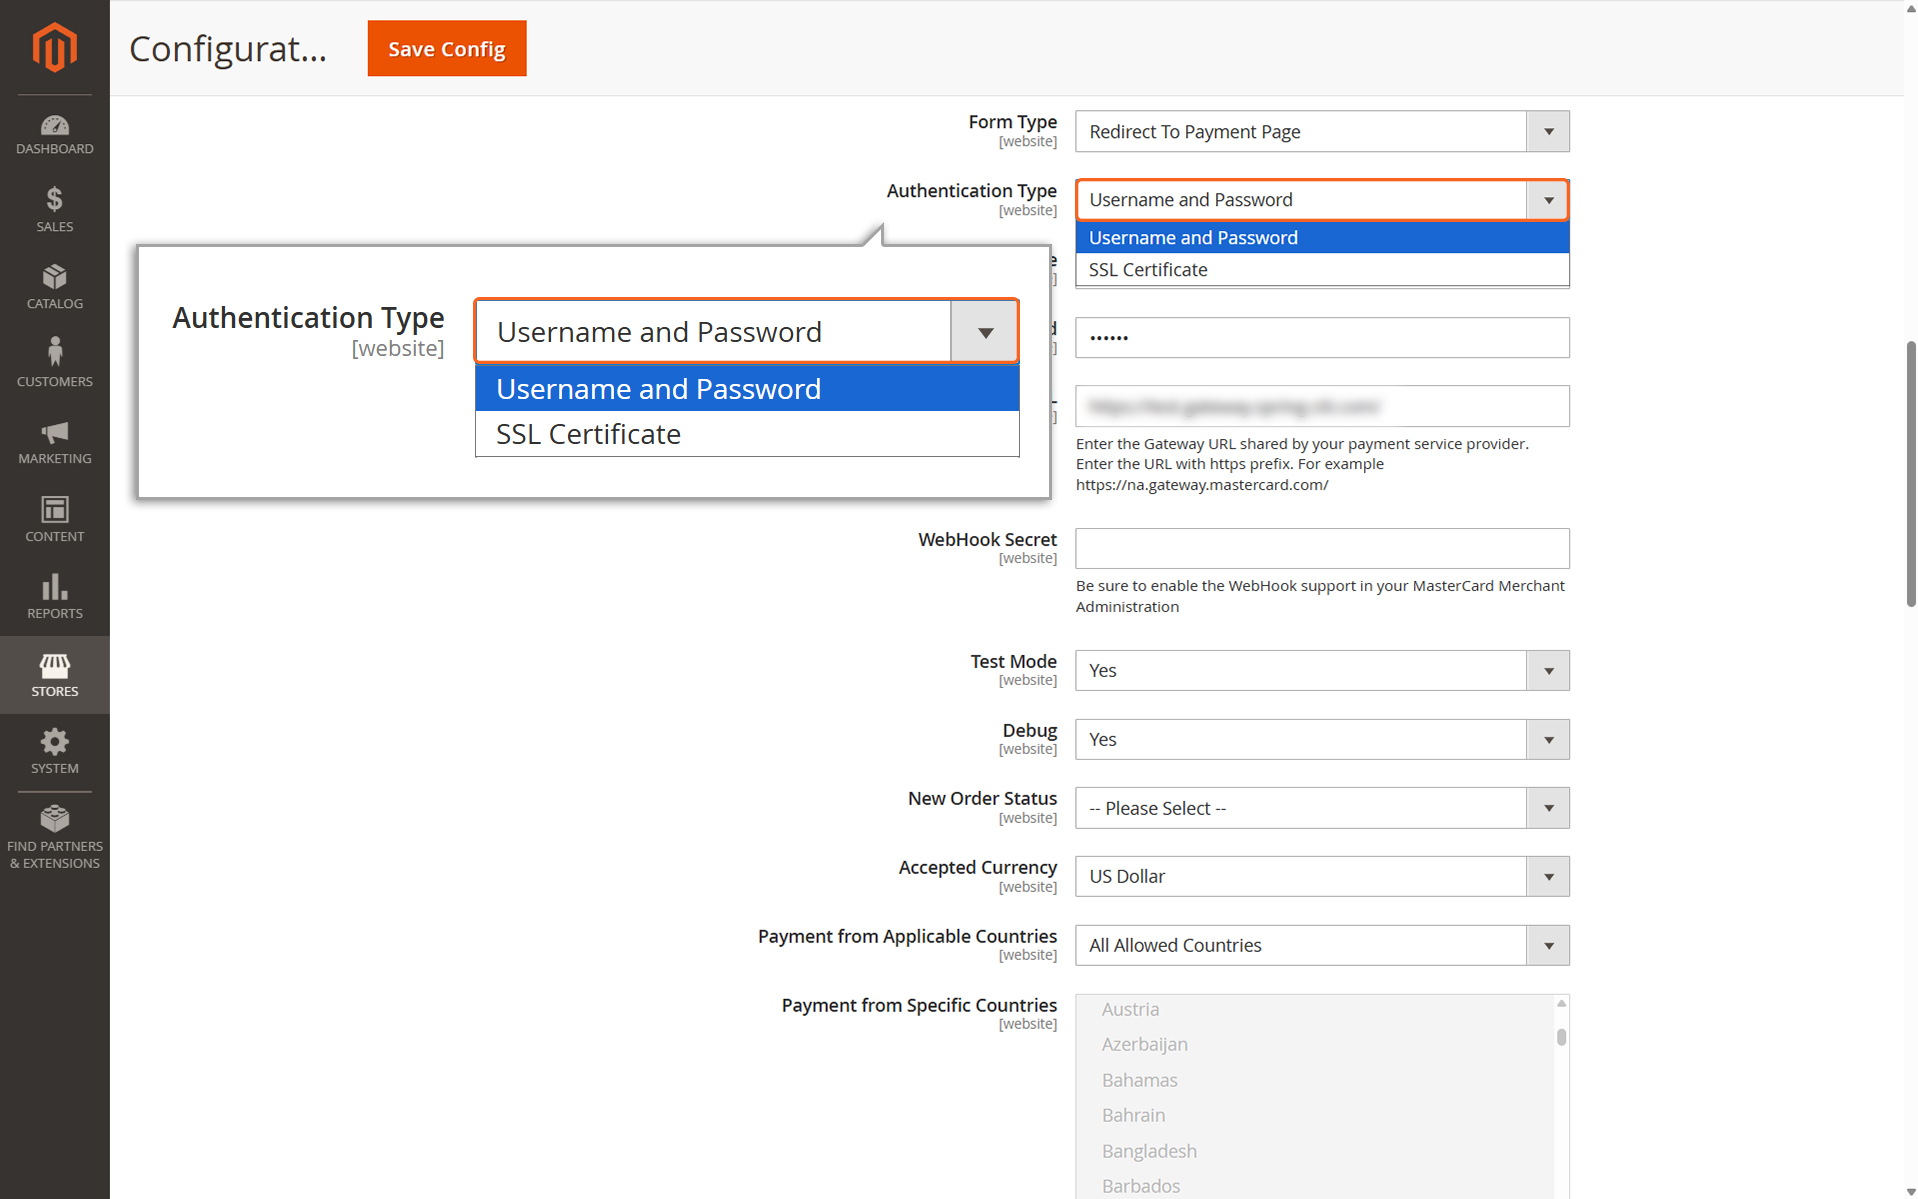
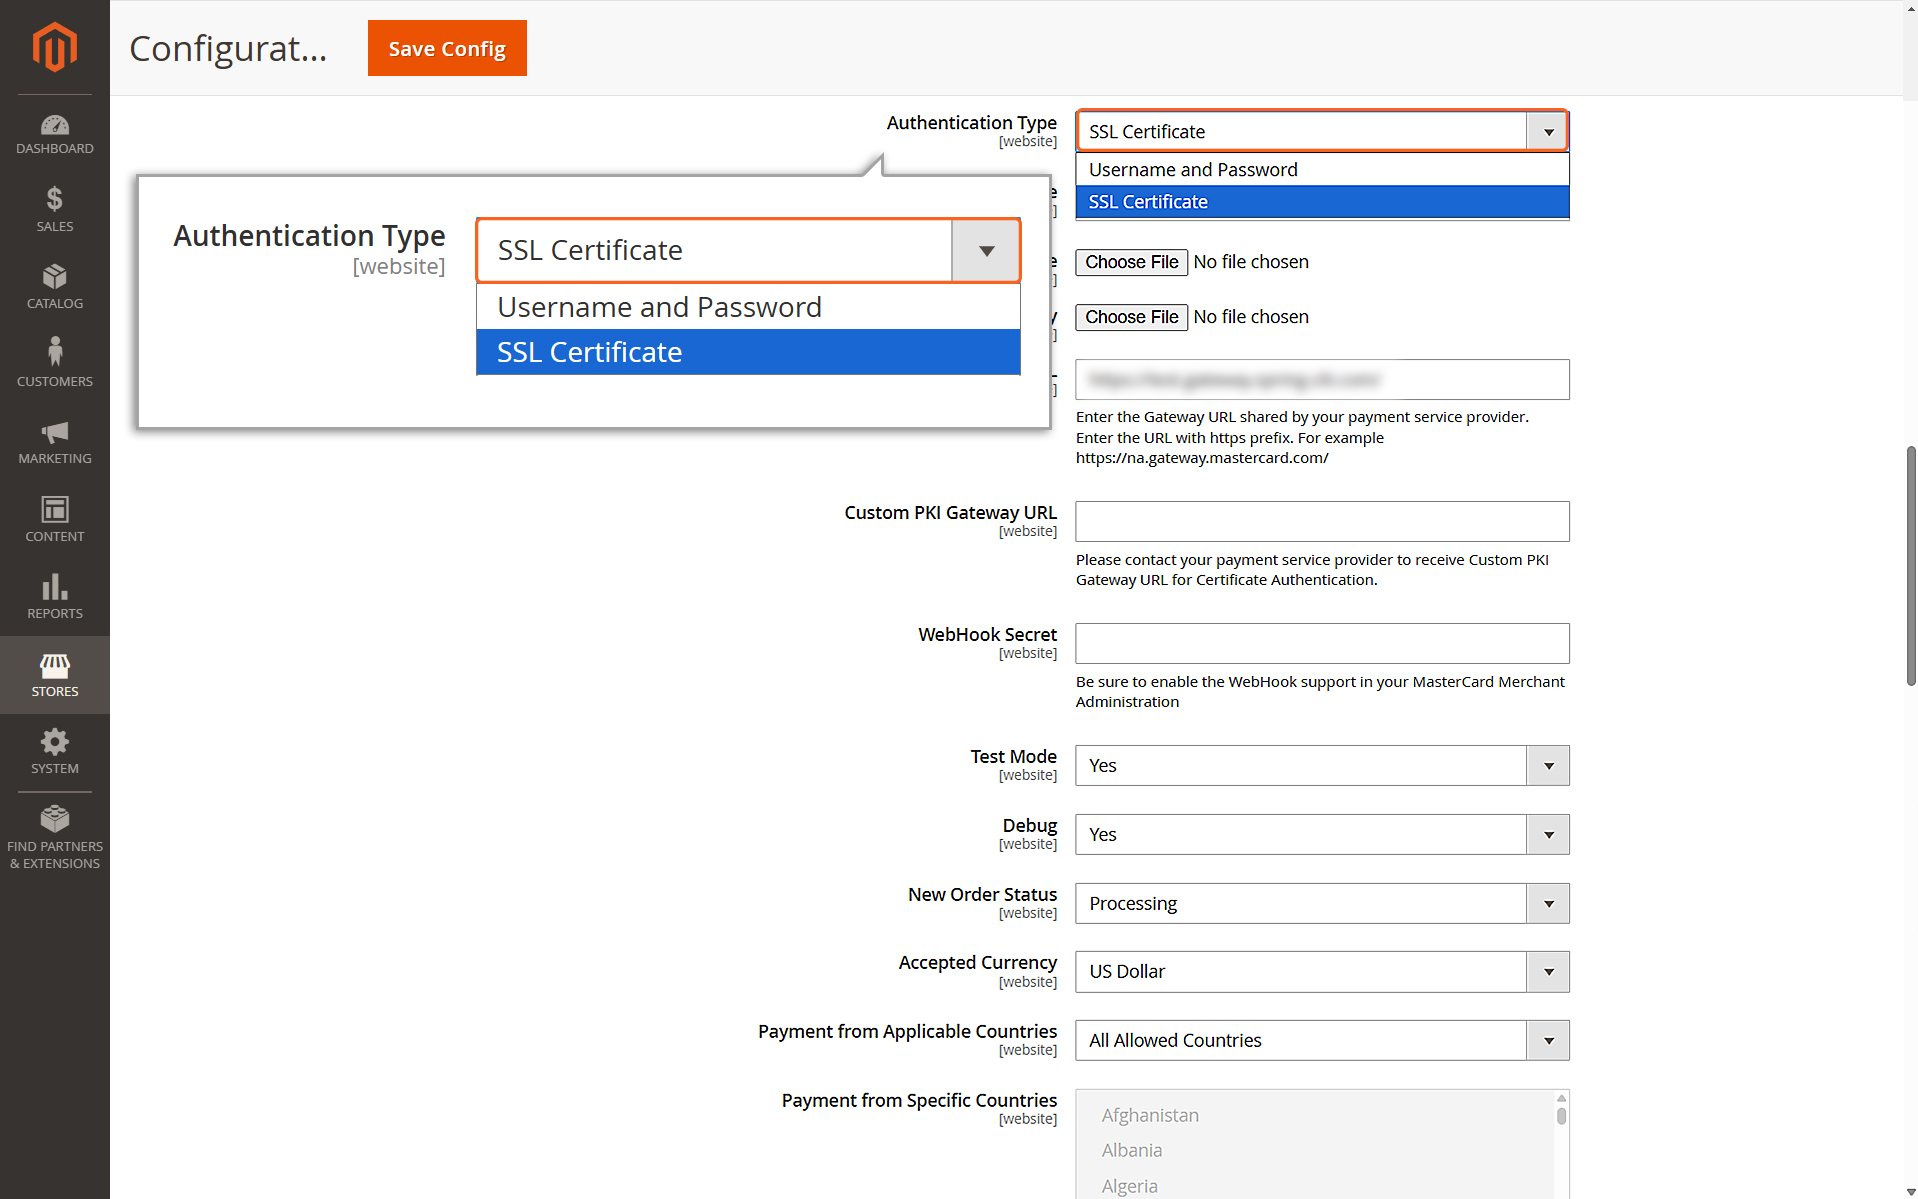
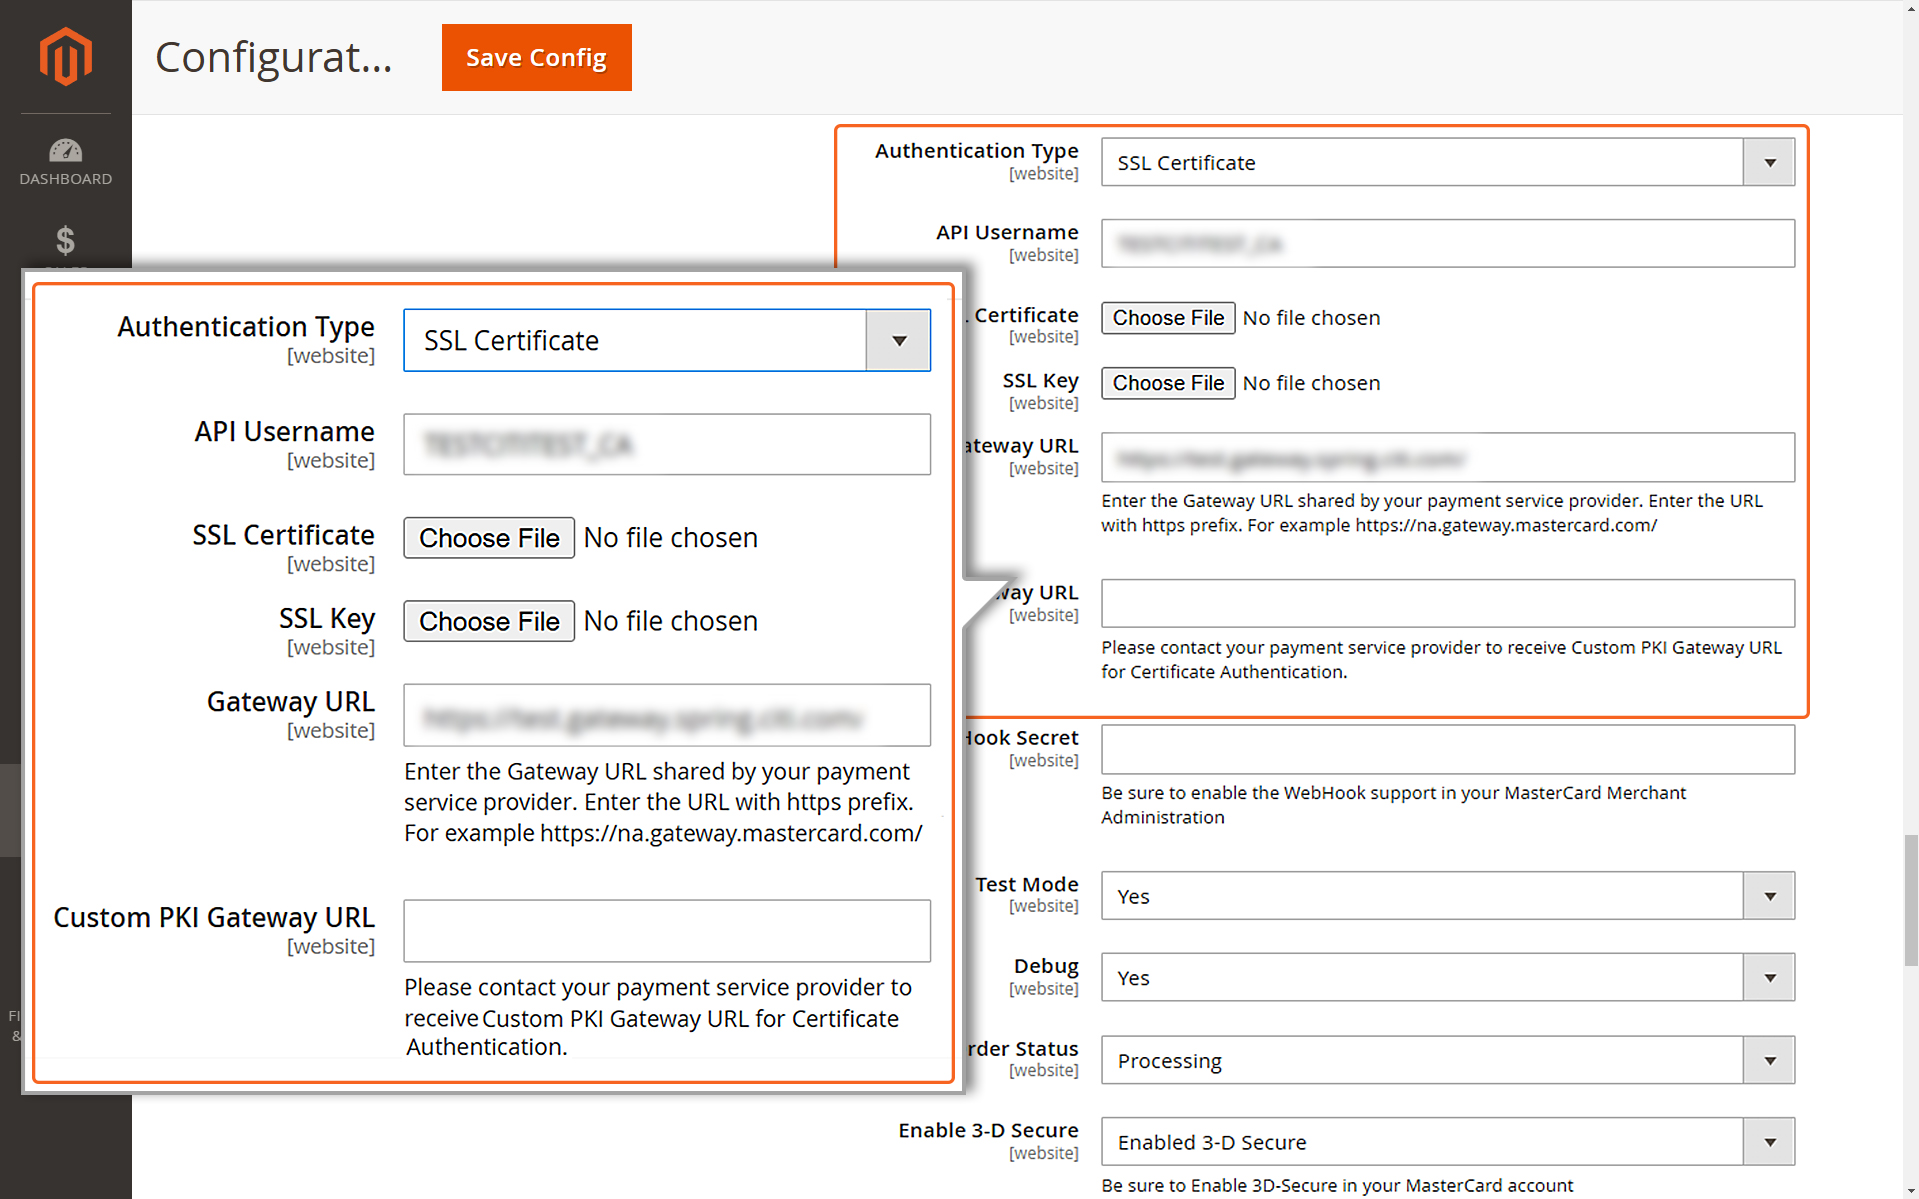
Authentication Type → SSL Certificate
Authentication Type → SSL Certificate
2. SSL Certificate
API Username: Enter your API username.
SSL Certificate: Upload the SSL certificate issued by a Mastercard-approved Certificate Authority (CA).
SSL Key: Upload the SSL Key.
Custom PKI Gateway URL: Contact your payment service provider/bank to acquire this URL.
Note
You must present a certificate to authenticate yourself to the Mastercard Gateway with certificate authentication. Certificates are typically issued from one of many organizations that act as Certificate Authorities (CAs). This model of authentication is a component of Public Key Infrastructure (PKI) where security is achieved through confidentiality, integrity, non- repudiation, and authentication.
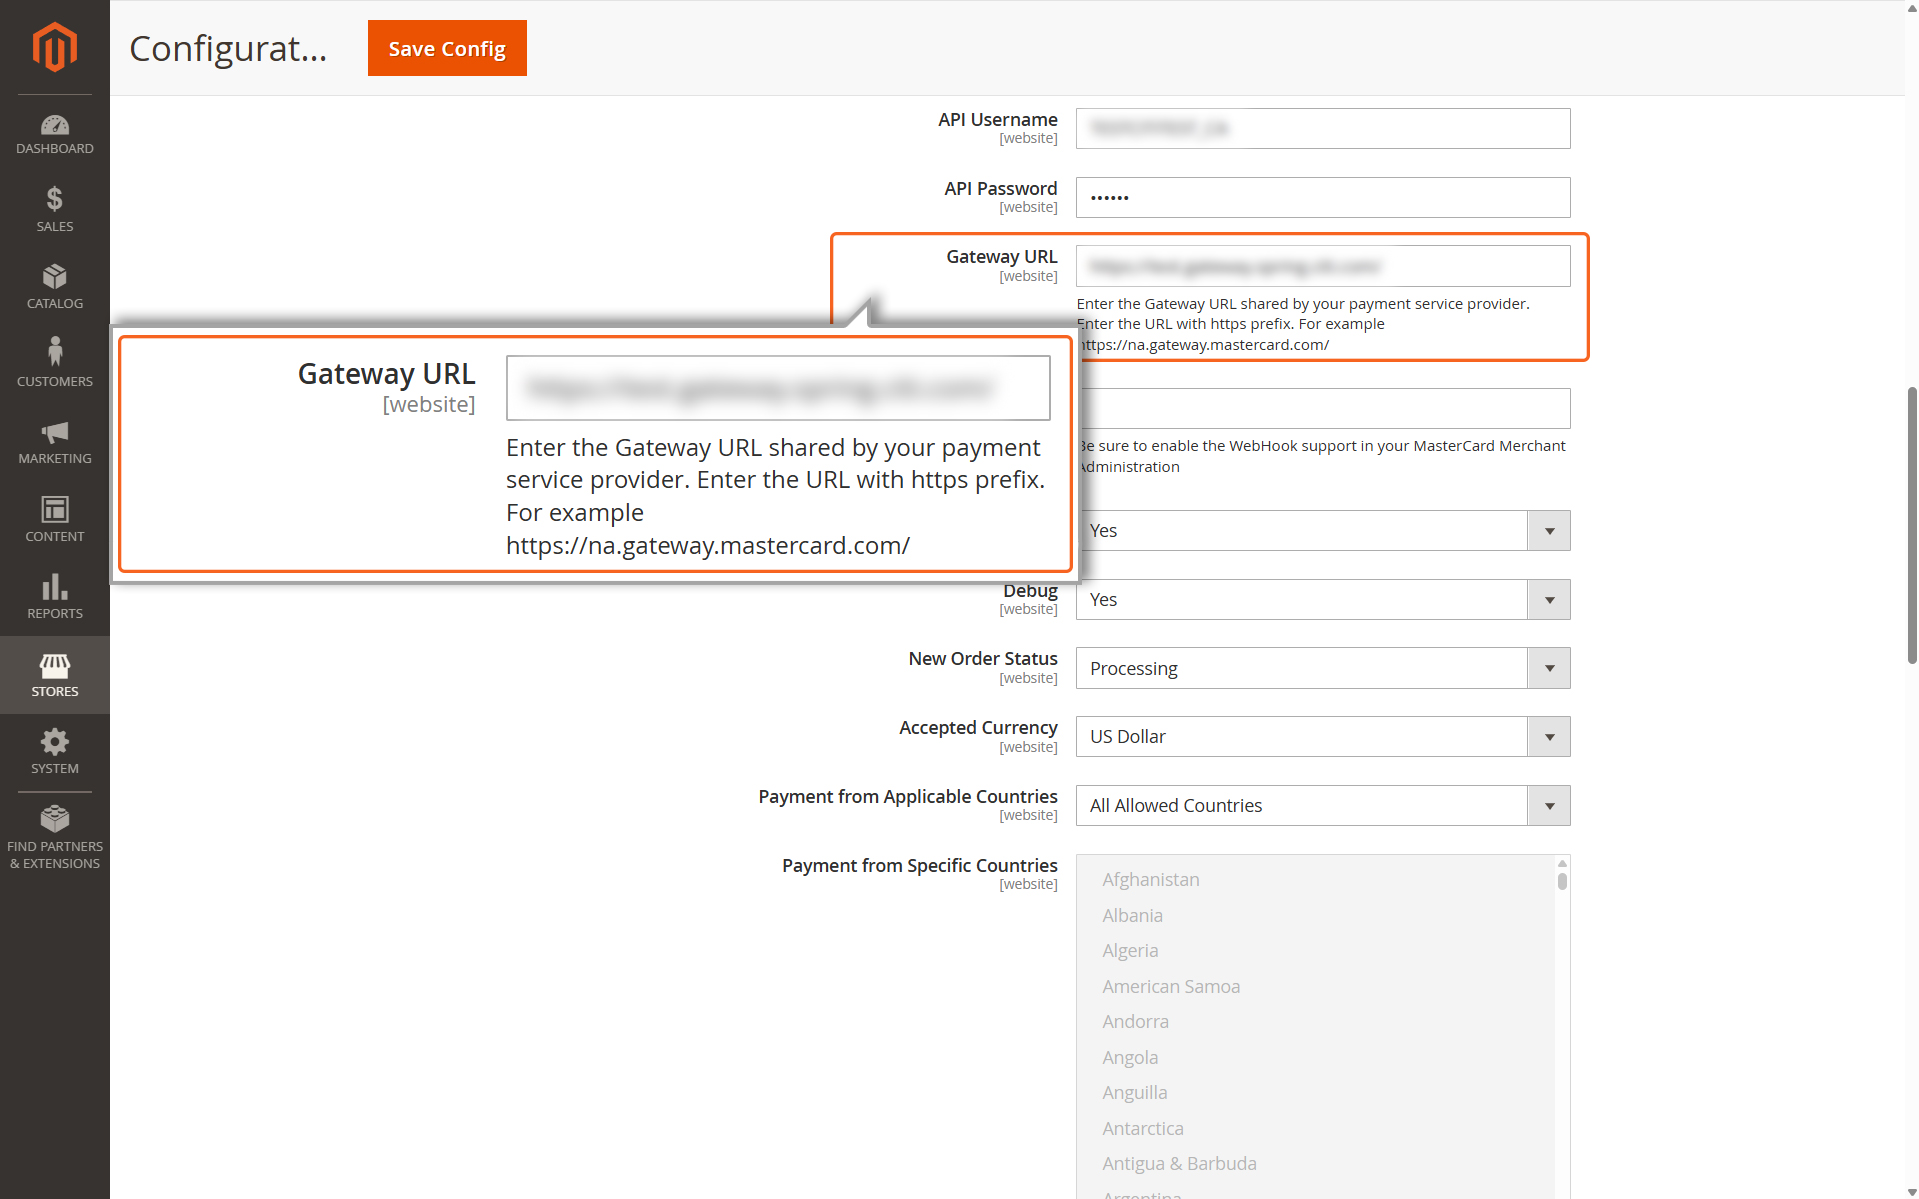
Gateway URL
Gateway URL
Enter the Gateway URL shared by your payment service provider. Enter the URL with https prefix. For example https://na.gateway.mastercard.com/
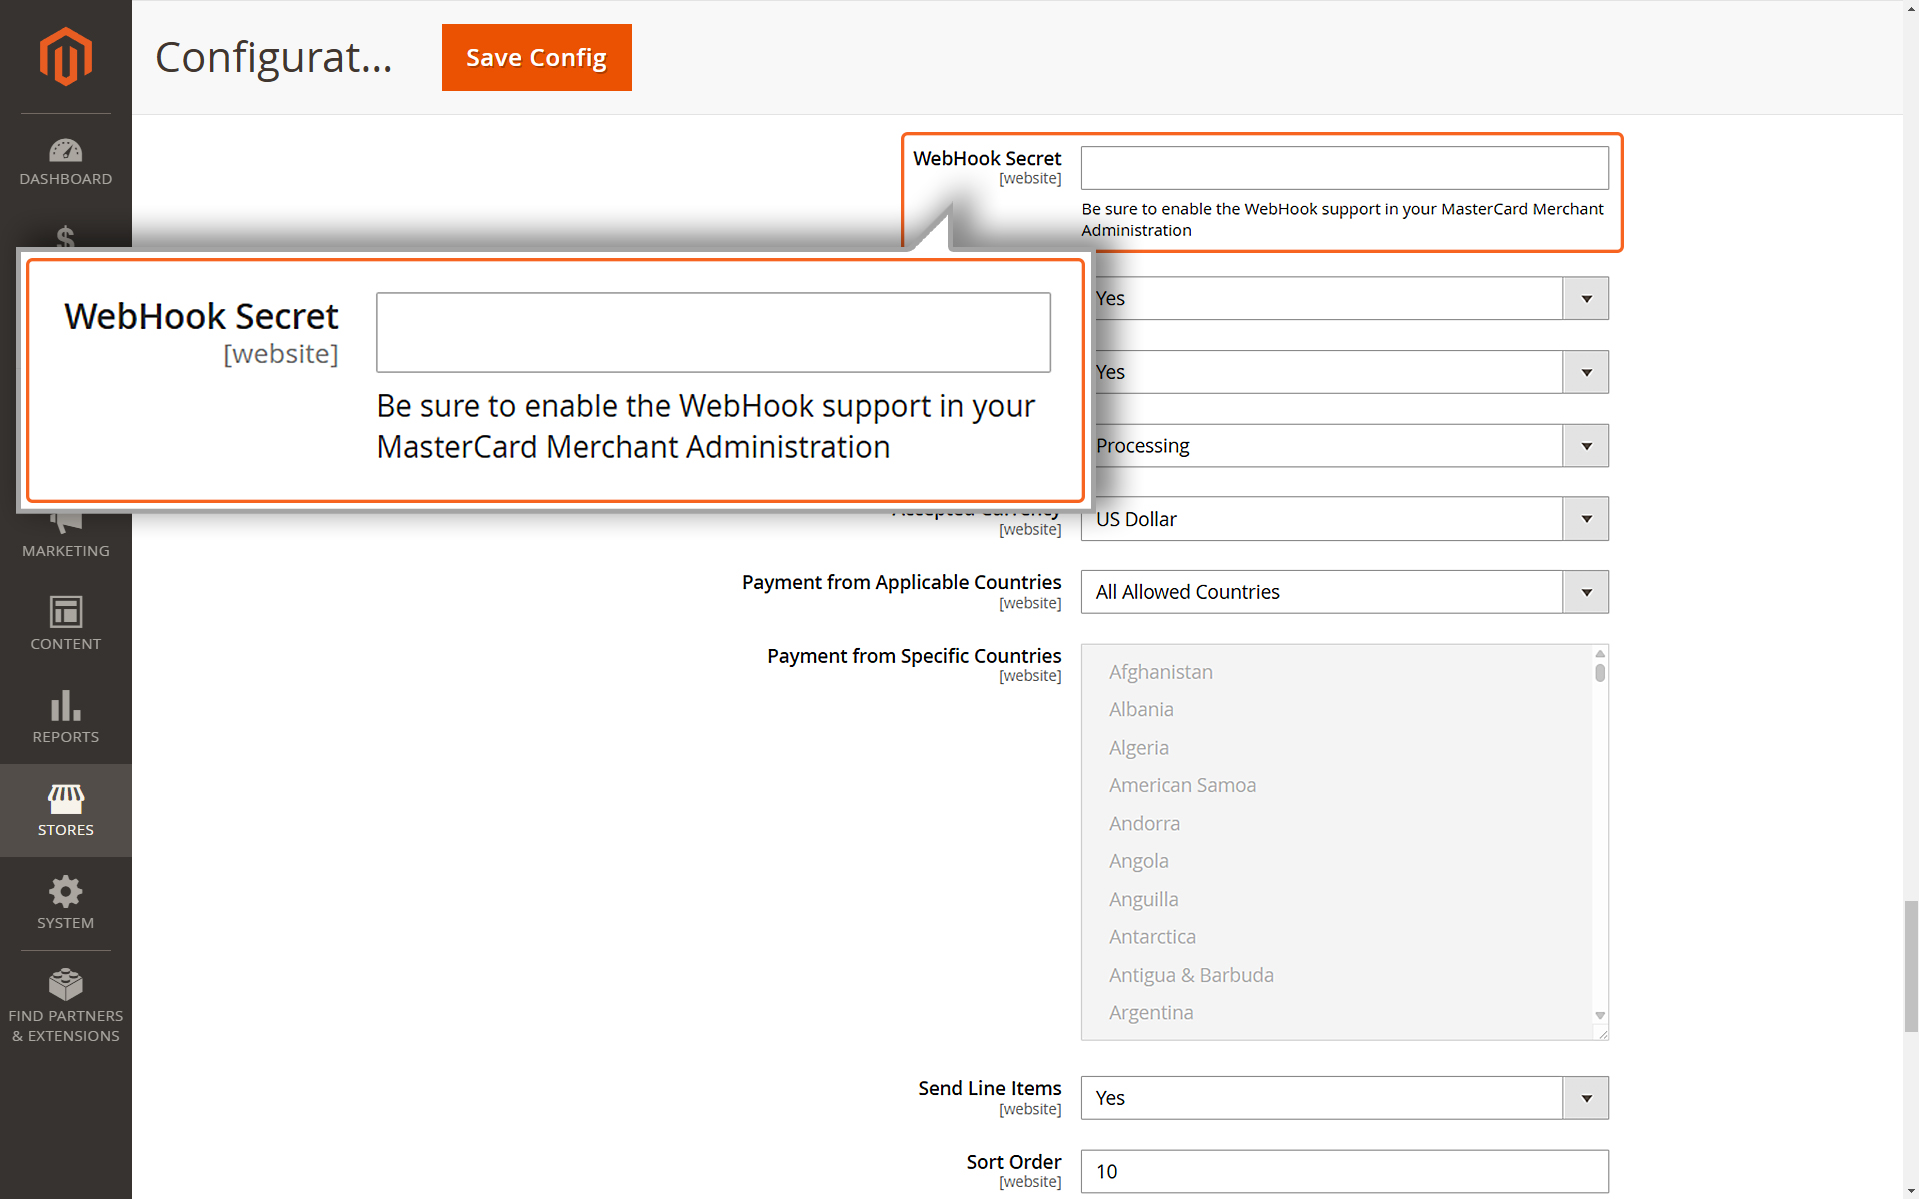
Webhook Secret
Webhook Secret
Enter the WebHook secret from your merchant account. Please refer to API Configuration to obtain the WebHook Secret.
Note
The plugin automatically includes the Notification URL, so manual configuration in the Merchant Administration portal is not required.
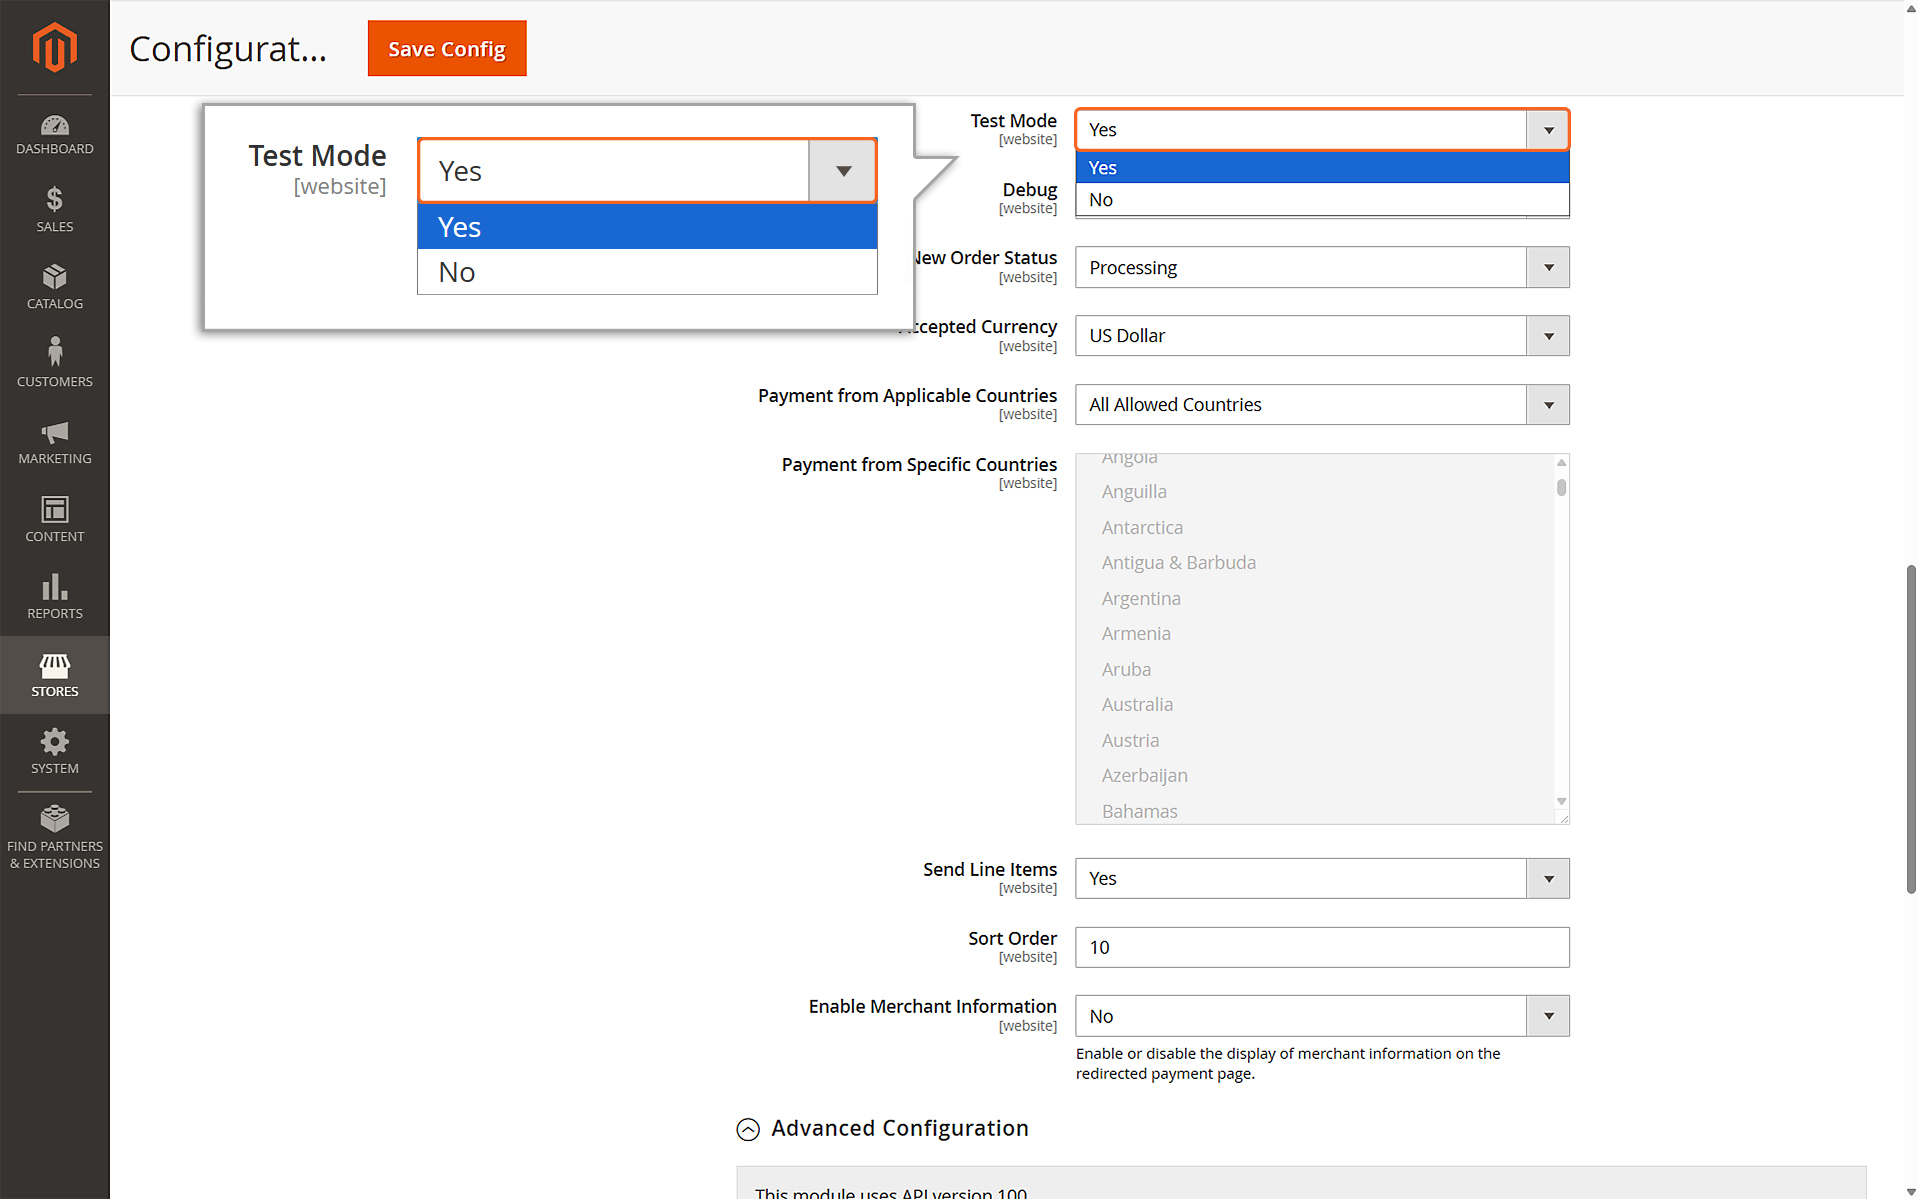
Select Yes to use test credentials (API username prefixed with TEST).
Select No to switch to live production mode.
Recommendation: Always test in Test mode before switching to Live mode.
Debug
Debug
Enable Debug by selecting Yes if you’re testing in Test Mode. Debugging creates detailed logs that can help you identify and fix any issues with your payment process.
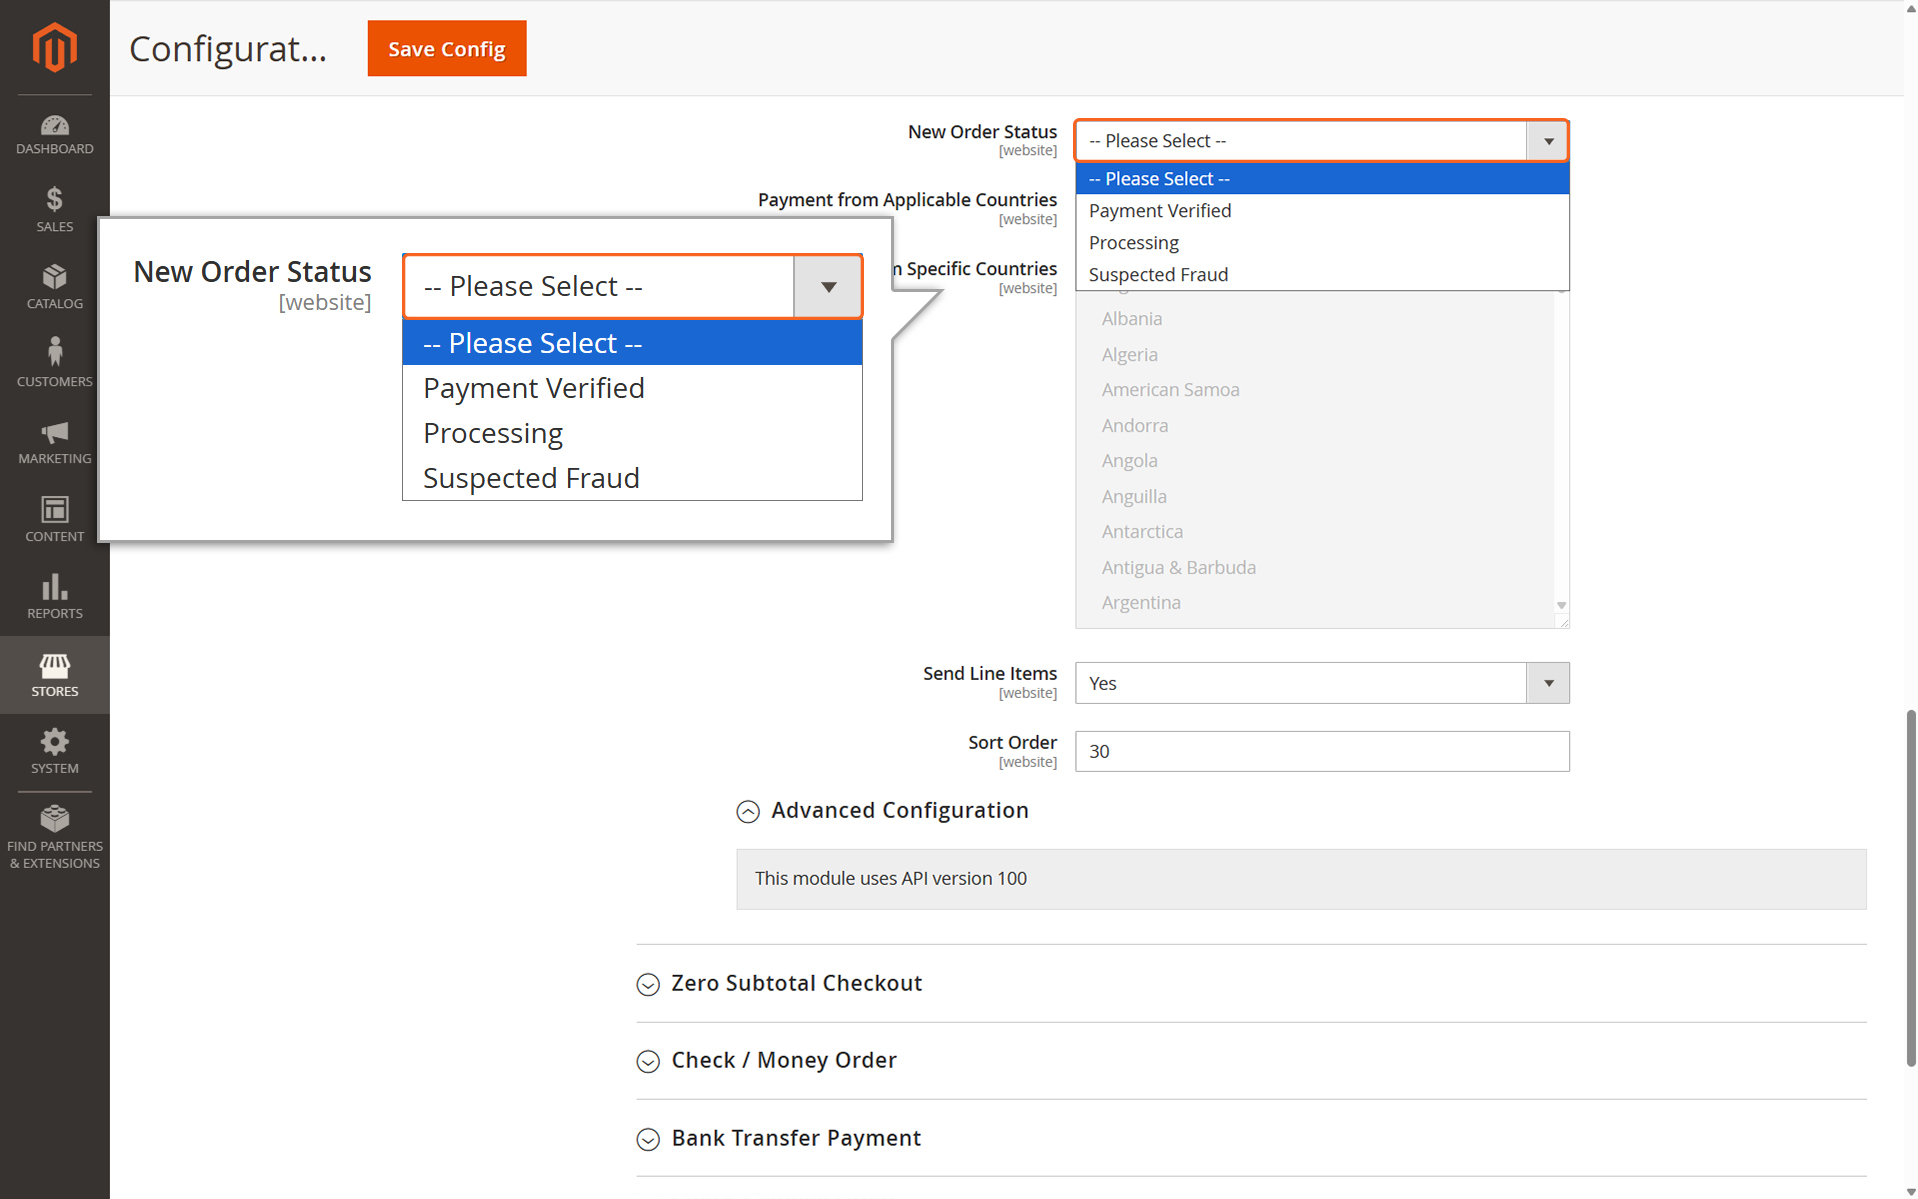
New Order Status
New Order Status
This setting determines how successfully placed orders are labeled in the Magento Platform after being processed. You can choose from three options:
Payment Verified: The payment has been confirmed.
Processing: The order is being handled.
Suspected Fraud: The order appears suspicious and may need review.
Changing this setting won’t impact how transactions are processed by the payment gateway—it only updates how they are displayed in your system.
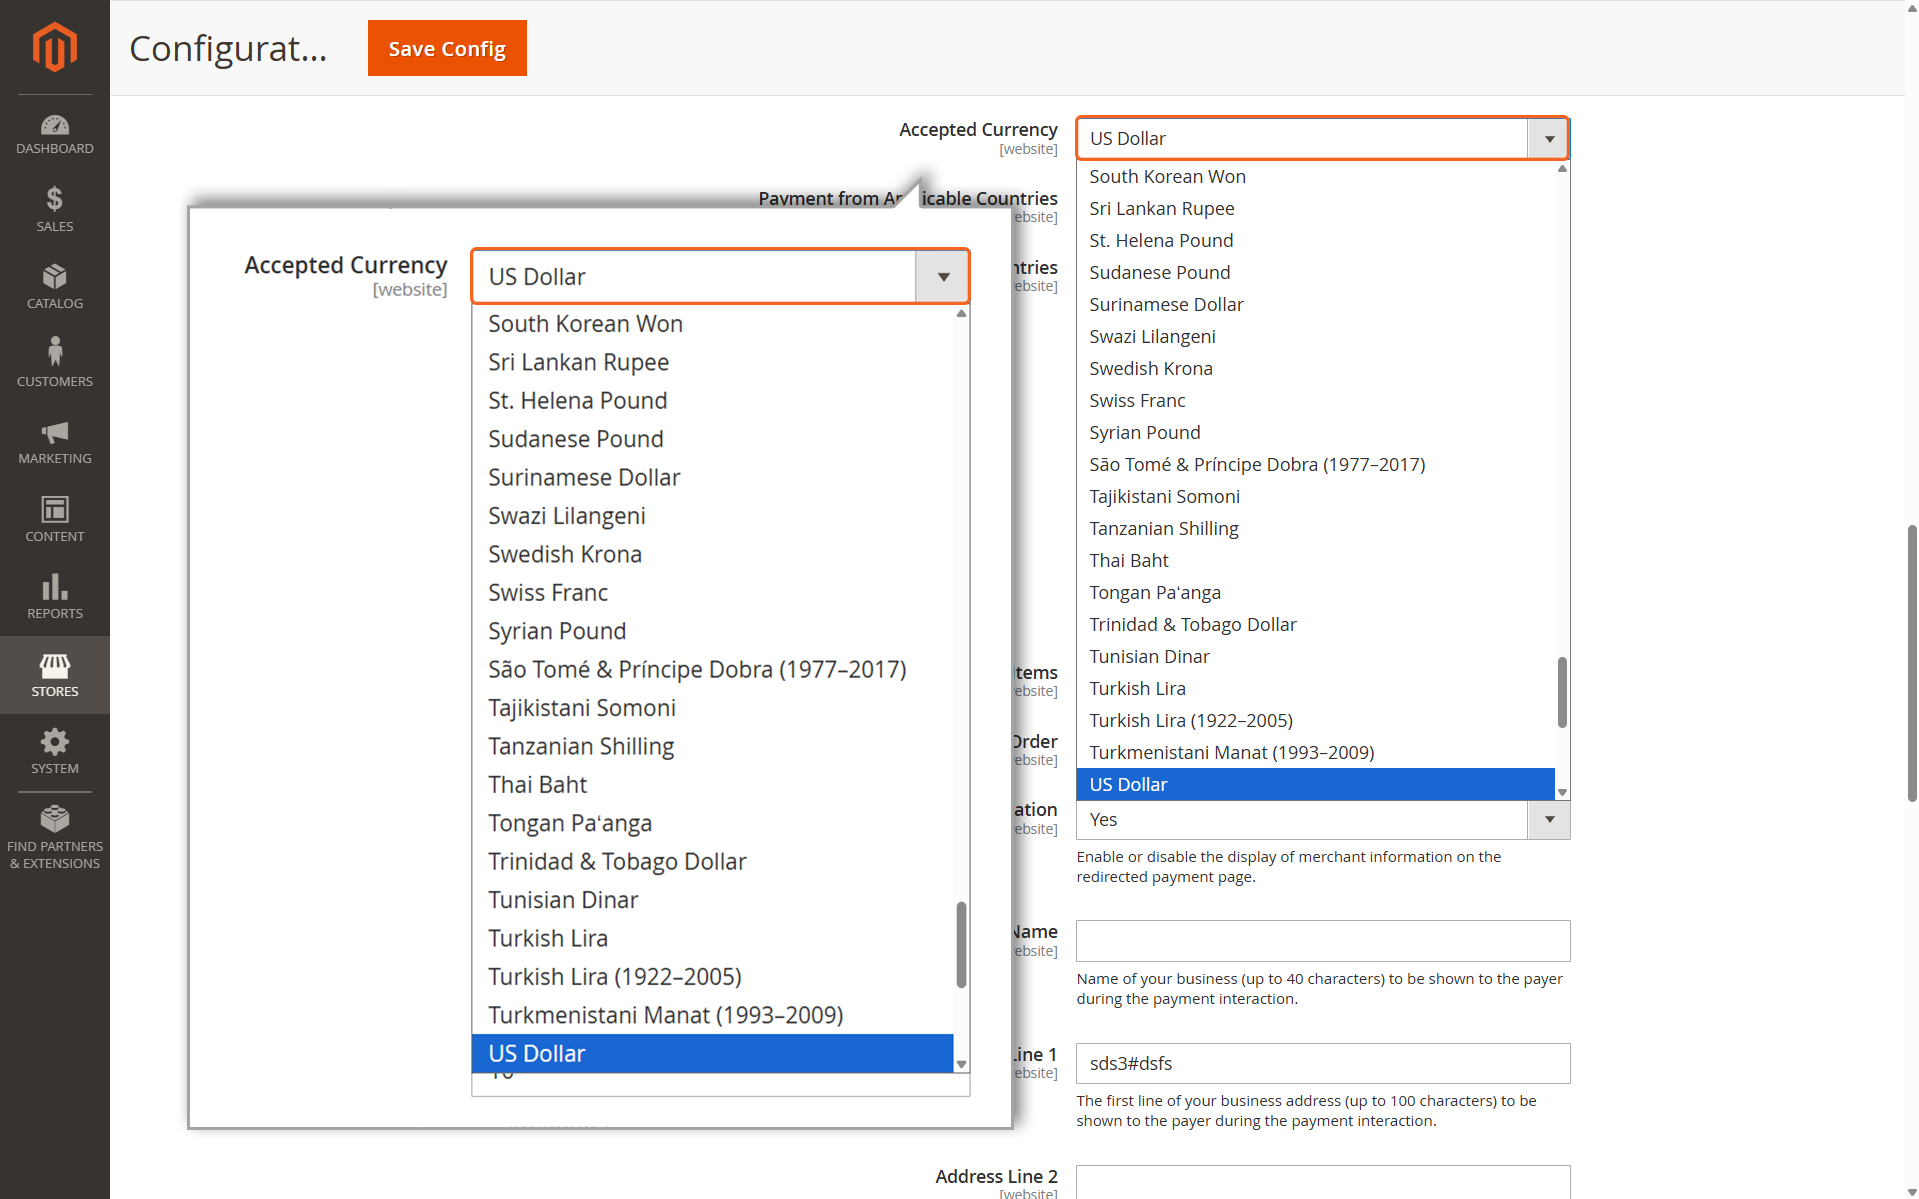
Accepted Currency
Accepted Currency
Choose the currency you want to use as the base for your store. This determines the default currency for all transactions.
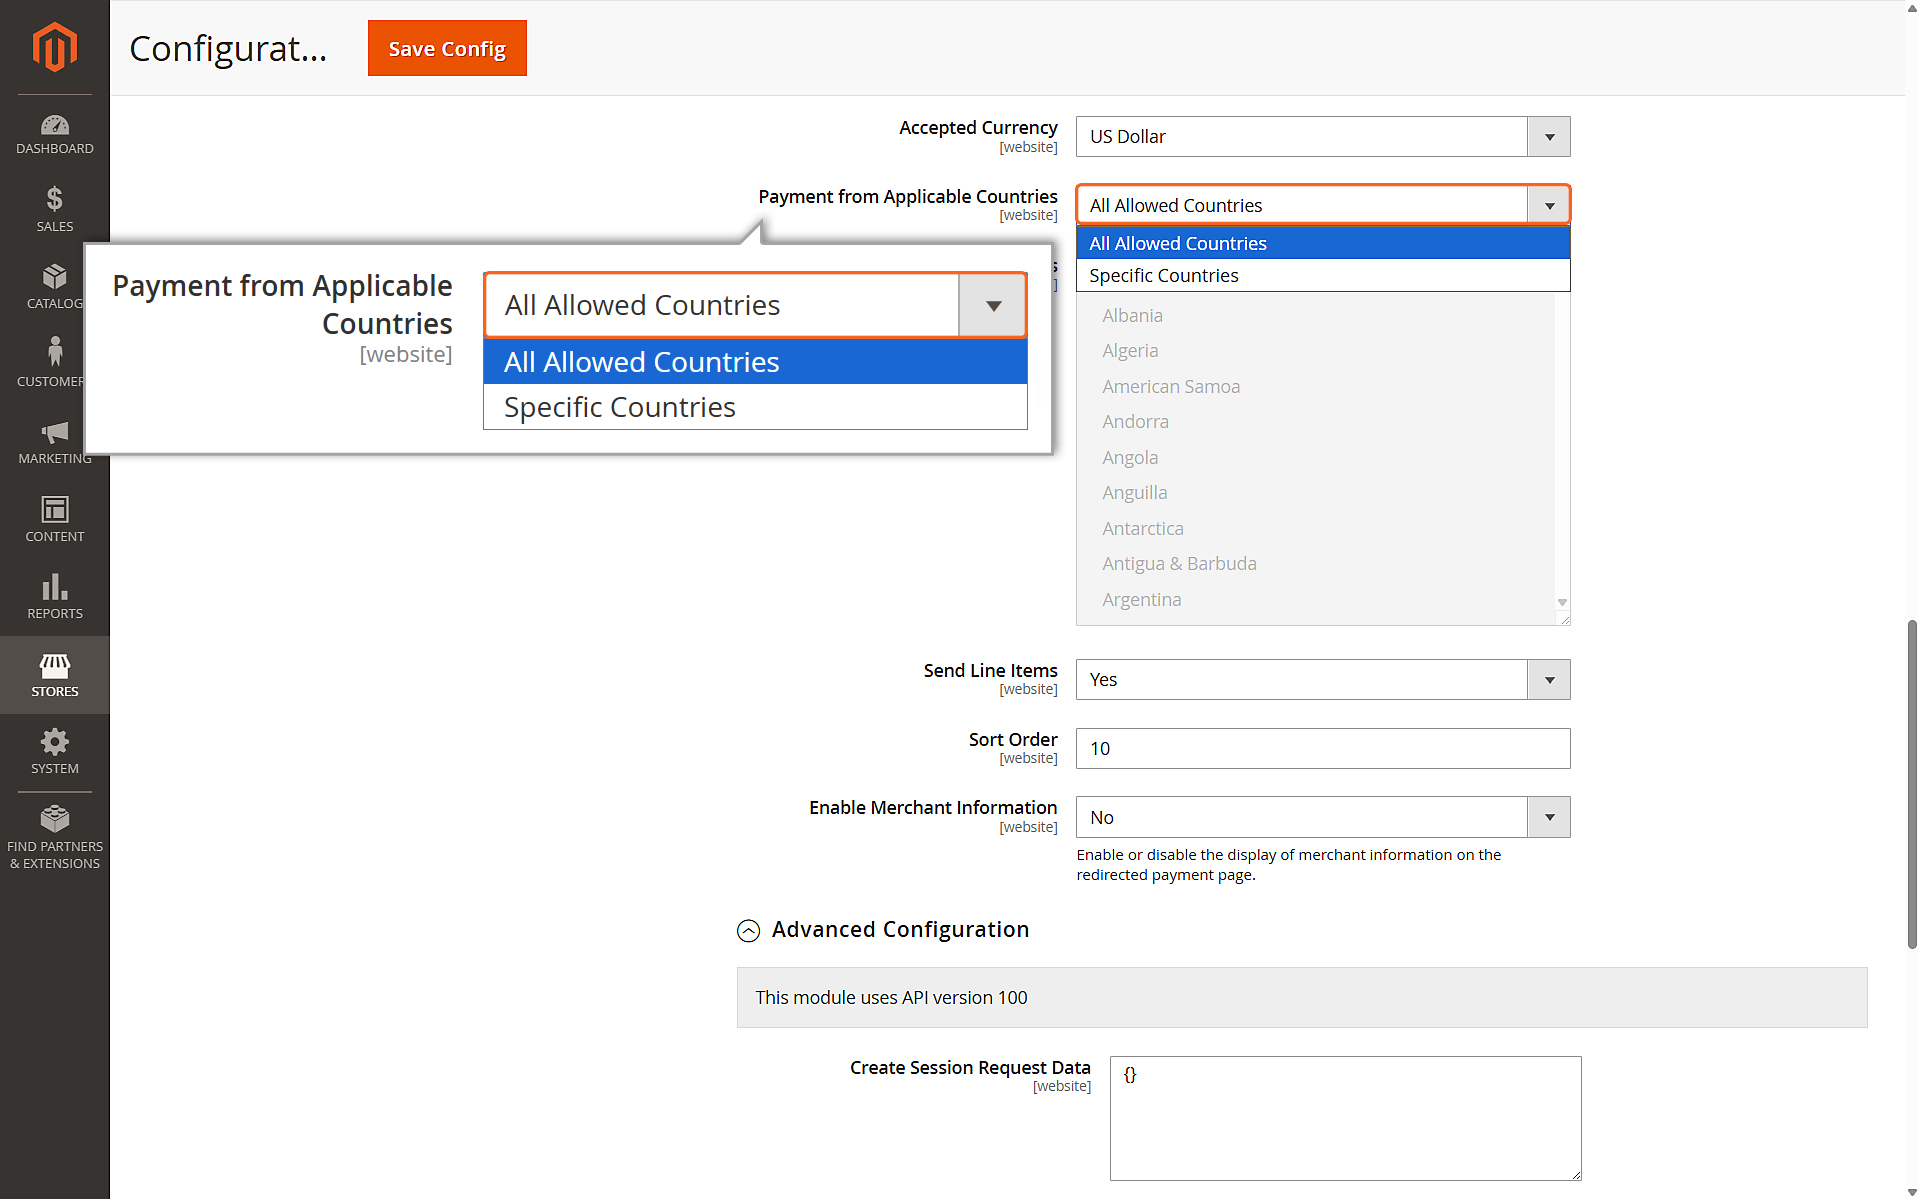
Payment from Applicable Countries
Payment from Applicable Countries
Merchants can decide which countries they want to accept payments from. This setting works separately from any blocking rules set in the Merchant Manager.
You have two choices:
All Allowed Countries: Payments can be processed from all countries that are allowed.
Specific Countries: You can pick certain countries from which payments will be accepted.
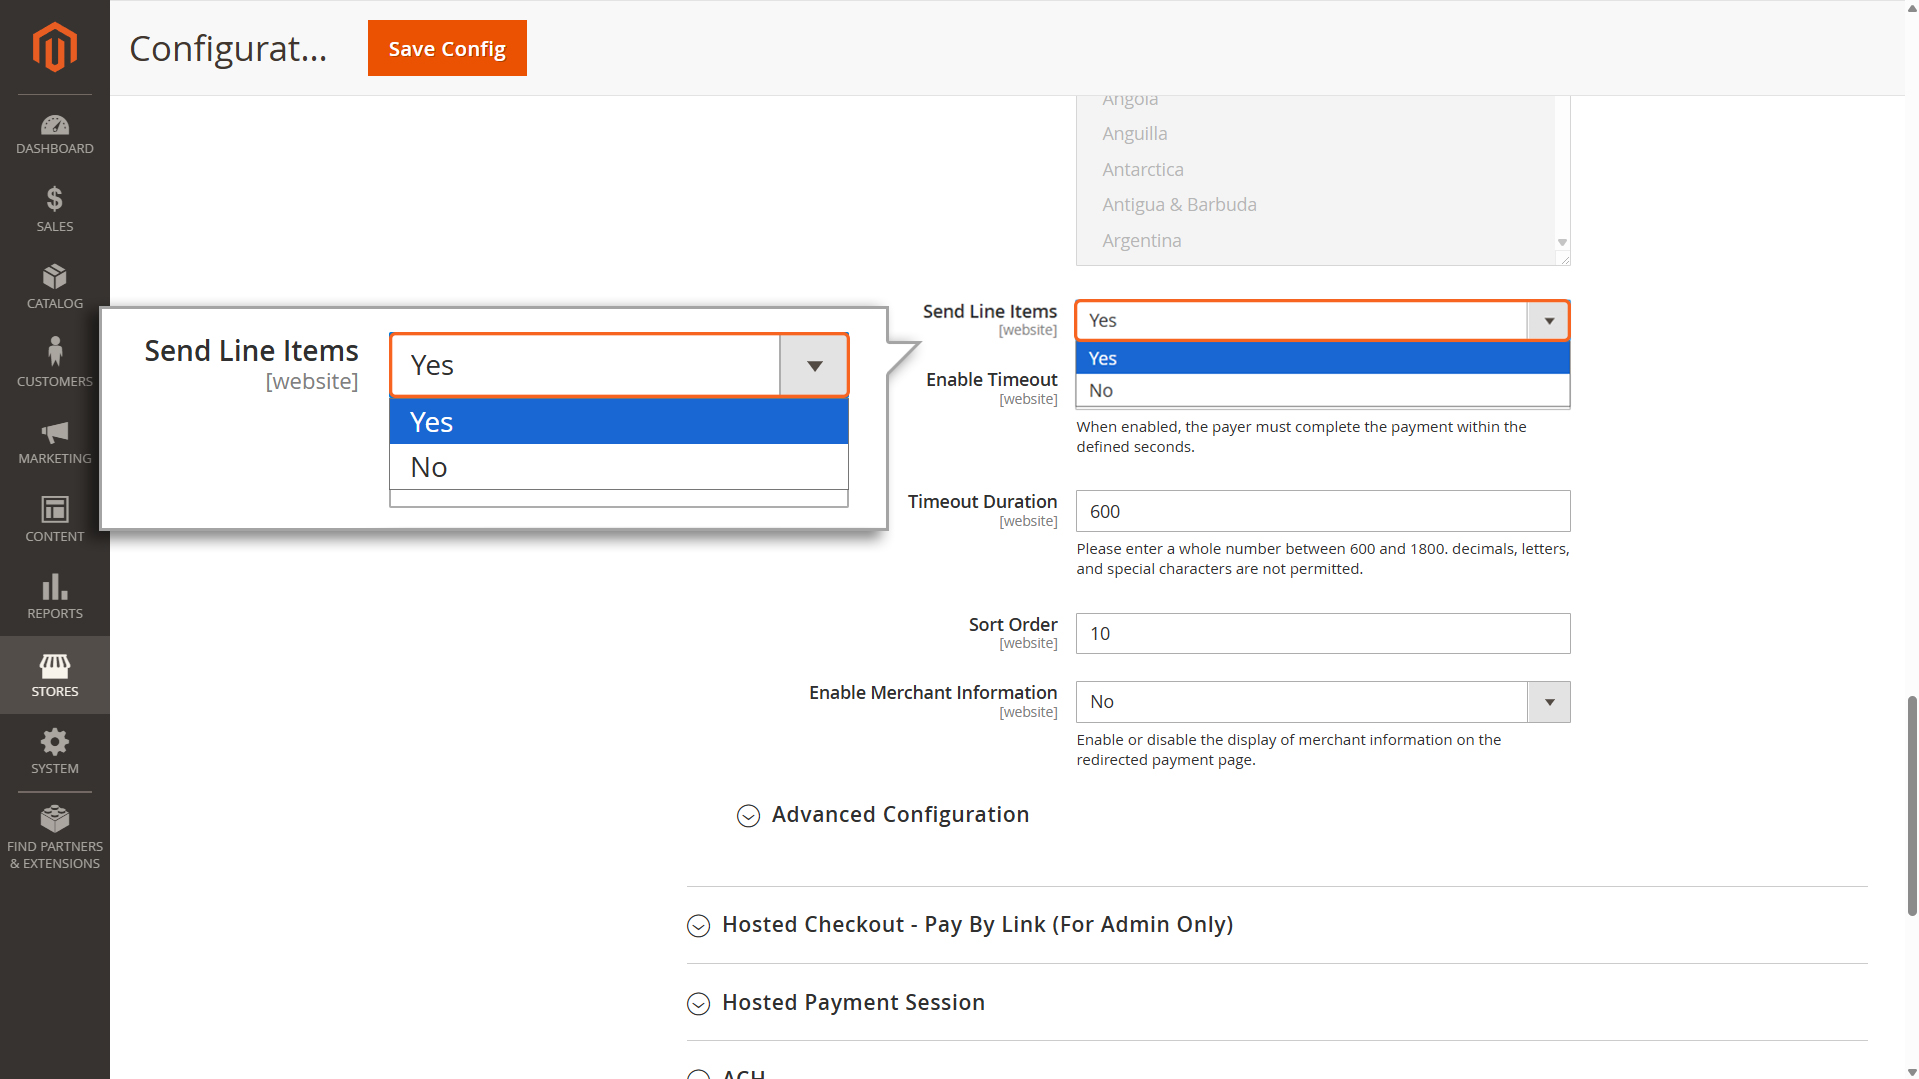
Send Line Items
Send Line Items
Select Yes if you want to include detailed order information (like item names, quantities, and prices) in the transactions sent to the Mastercard Gateway. This helps with tracking and provides more details for reporting.
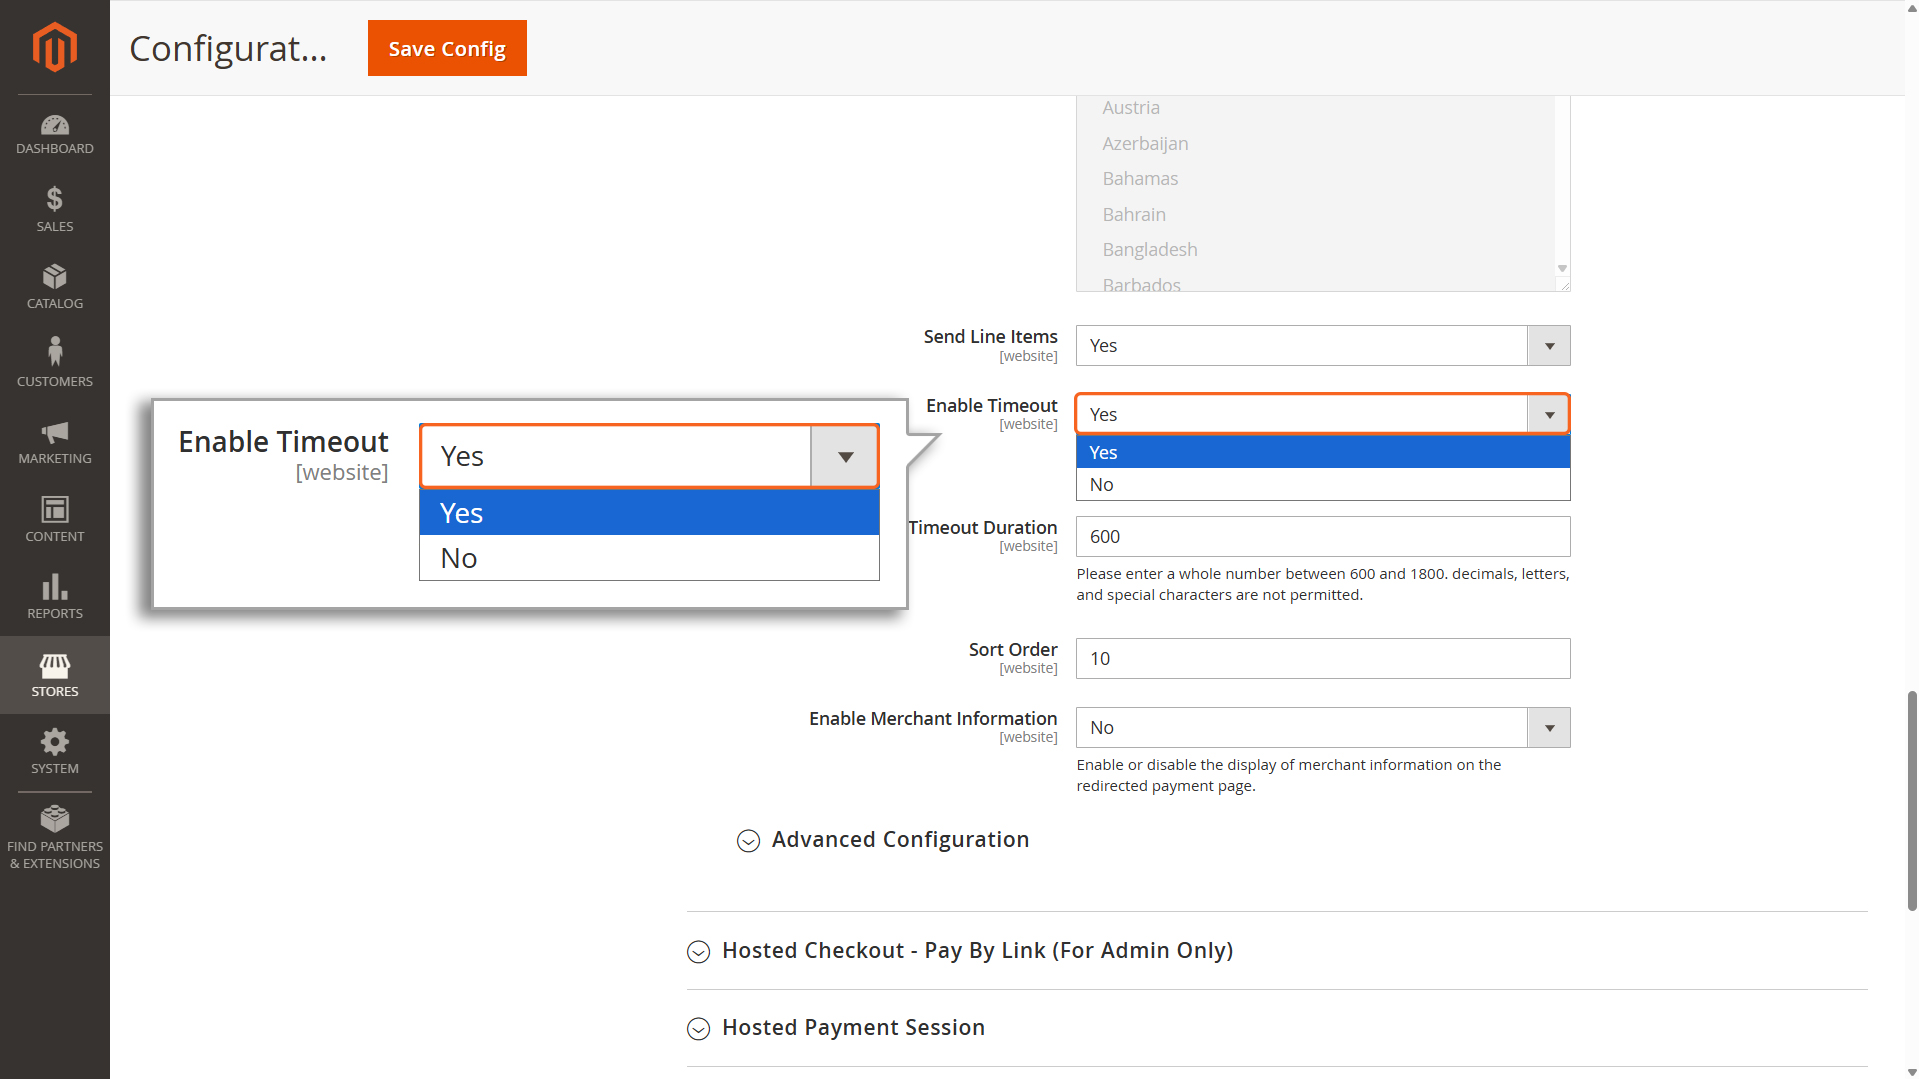
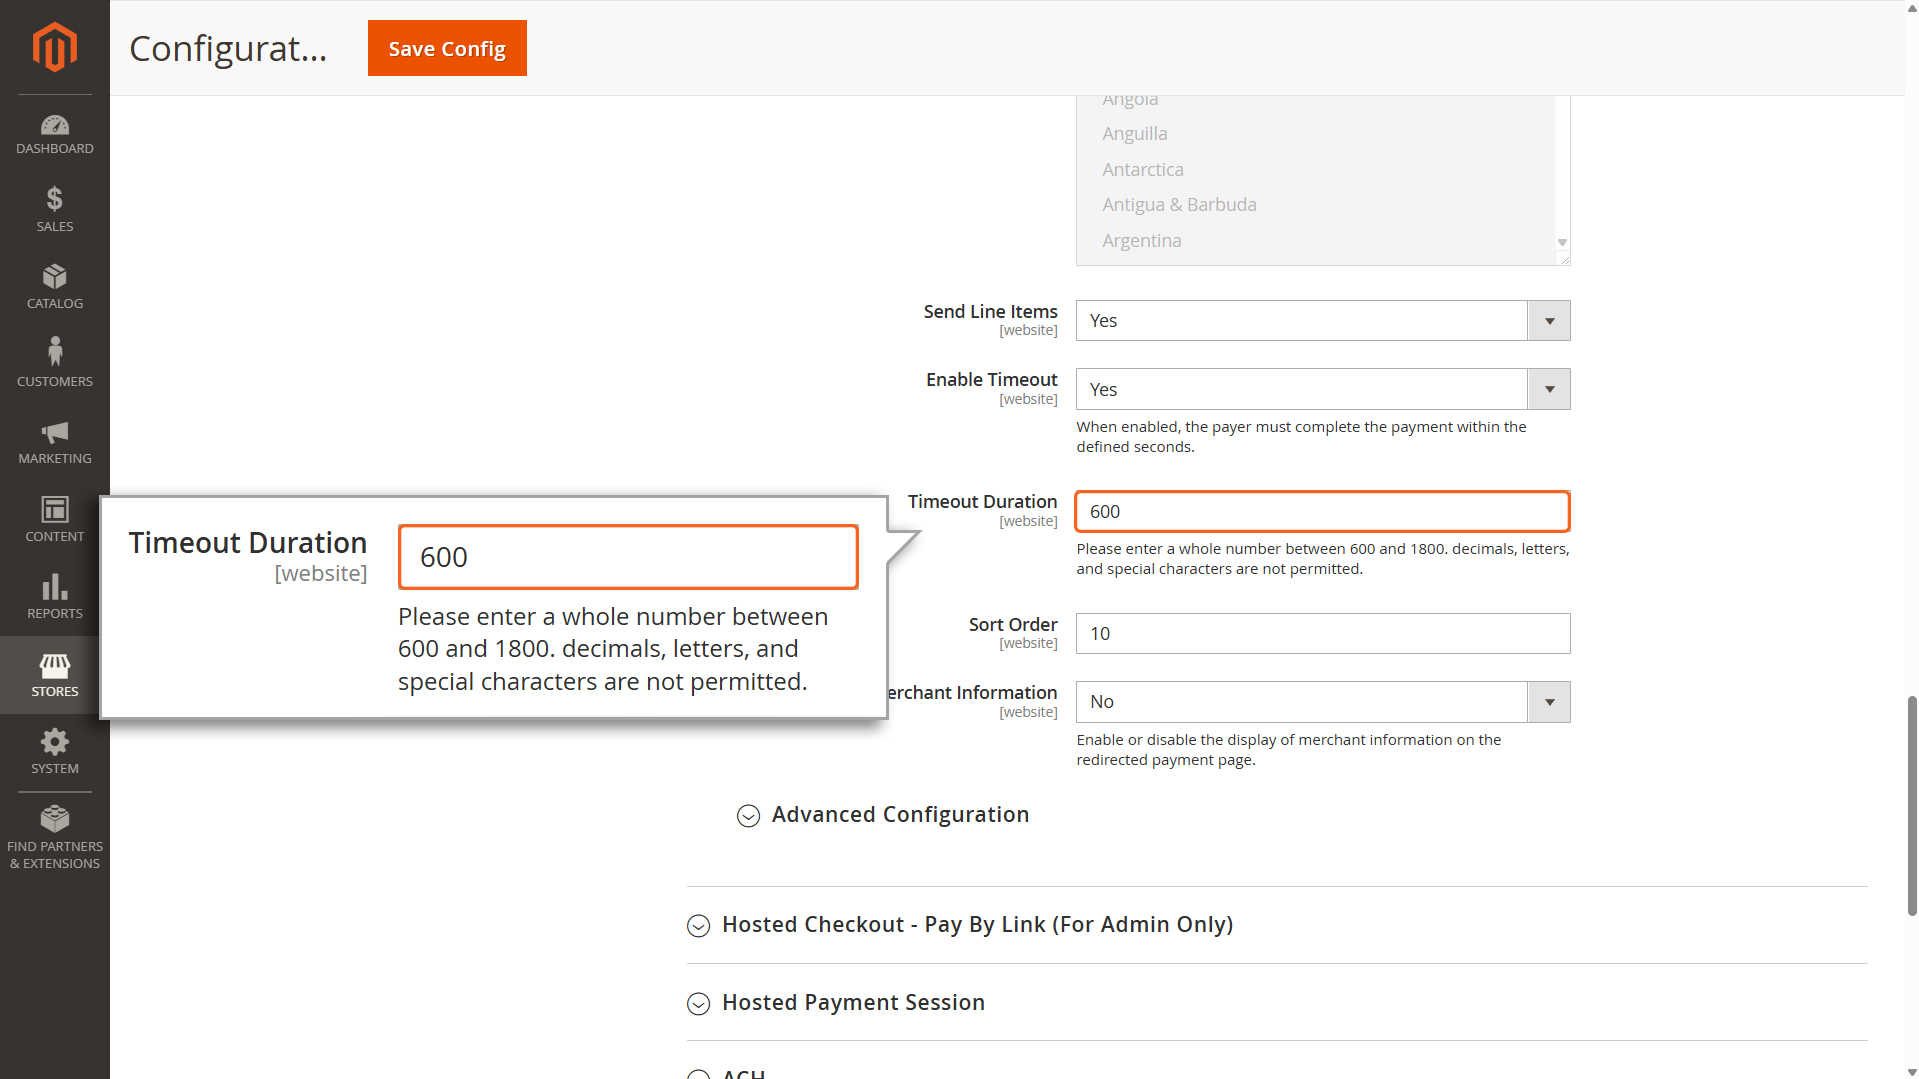
Payment Timeout
When Payment Timeout is enabled, the payer must complete the payment within the number of seconds specified in the Timeout Duration field. If the timeout duration is reached, the payment session will expire, and the user must restart the transaction. The Timeout Duration field supports only whole numbers between 600 and 1800. Decimals, letters, and special characters are not permitted.
Enable Timeout
Time duration
Sort Order
Sort Order
This controls the order in which this payment method appears to customers. A lower number means higher priority (e.g., 0 is the top priority).
Merchant Information
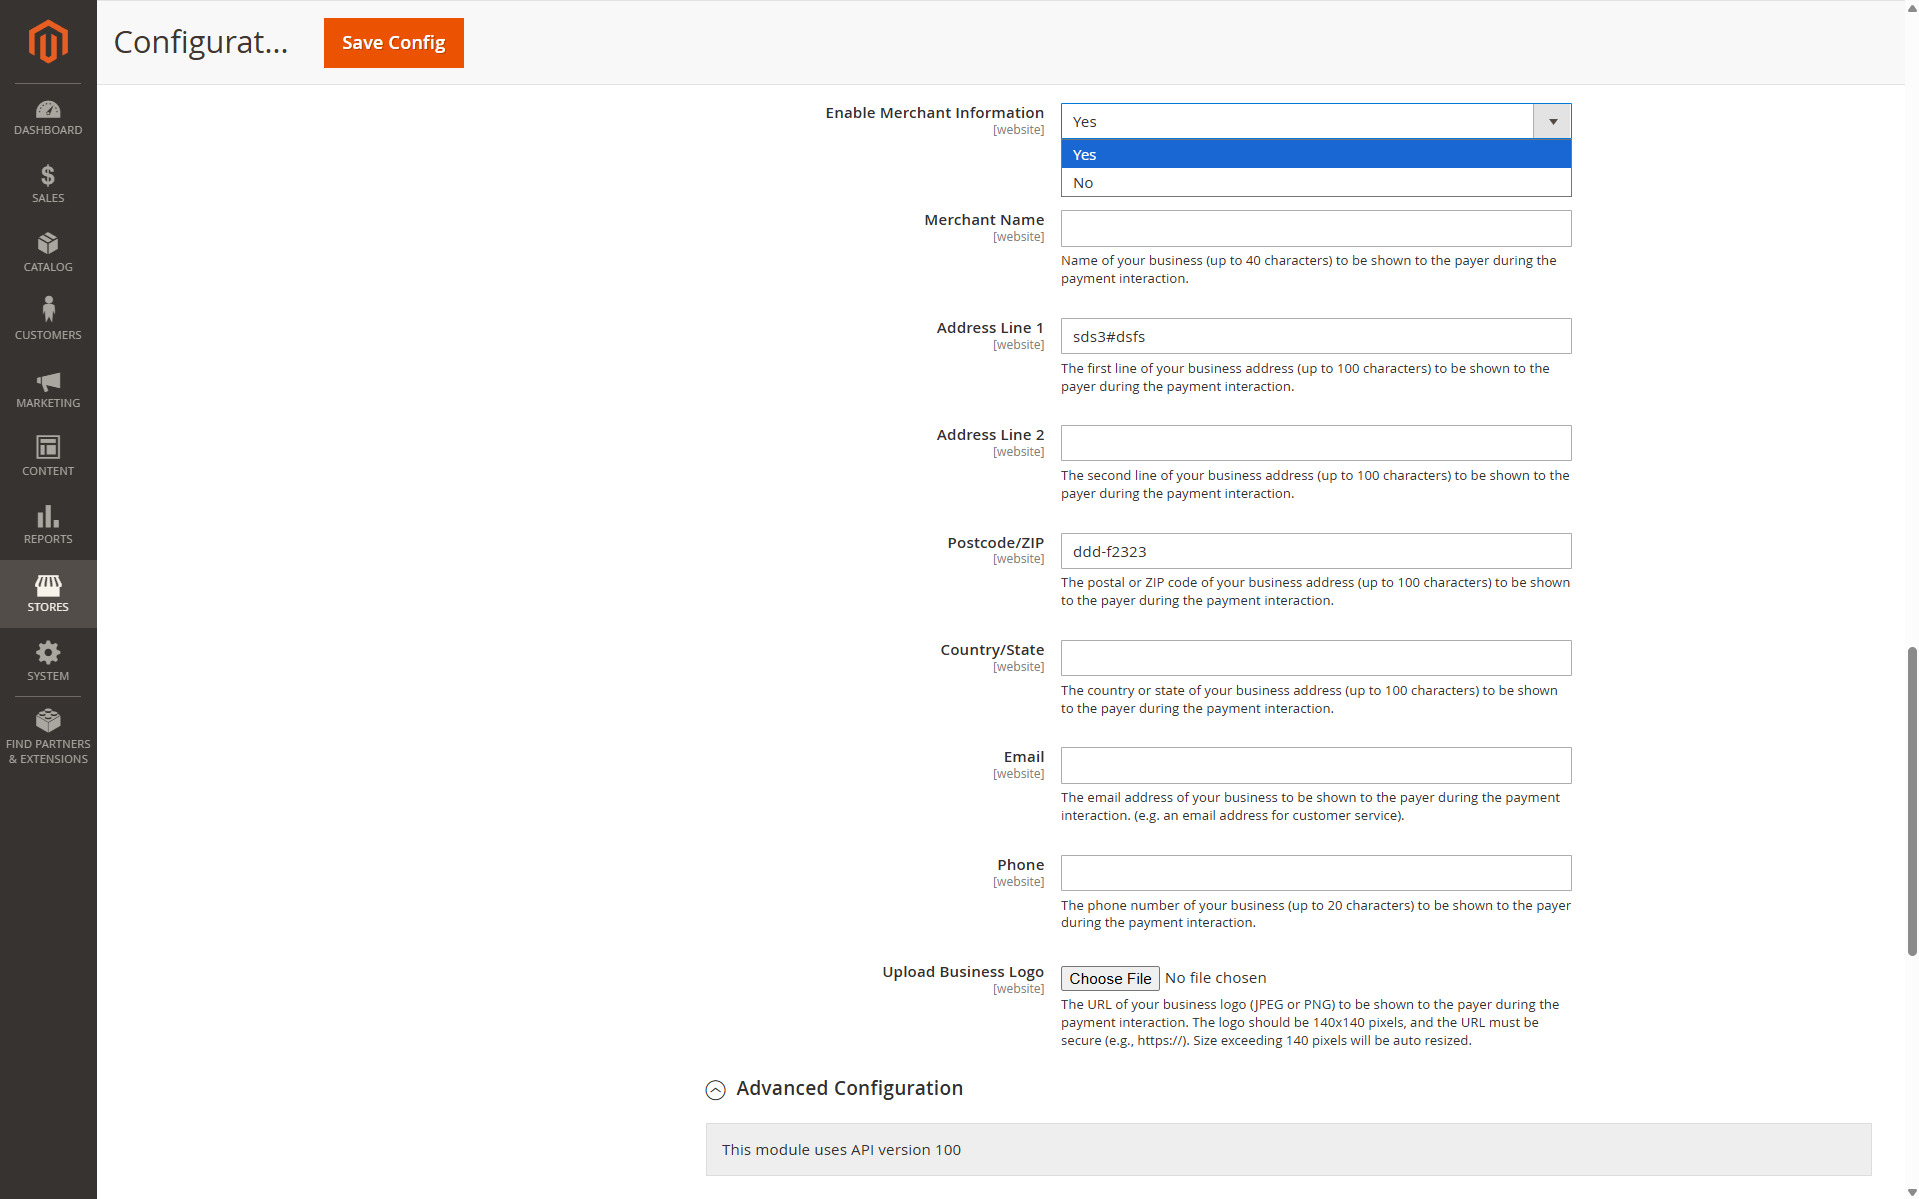
Merchant Information
This section is displayed only when “Redirect to Payment Page” is selected for Checkout Interaction. Enable Merchant Information to activate the configuration needed for this section as well as display Merchant Information on the redirected payment page.
Merchant Name: Enter your business name (up to 40 characters) to be displayed to the payer during the payment interaction.
Address line 1: Enter the first line of your business address (up to 100 characters) to be displayed to the payer during the payment interaction.
Address line 2: Enter the second line of your business address (up to 100 characters) to be displayed to the payer during the payment interaction.
Postcode/ZIP: Enter the postal or ZIP code of your business address (up to 100 characters) to be displayed to the payer during the payment interaction.
Country/State: Enter the country or state of your business address (up to 100 characters) to be displayed to the payer during the payment interaction.
Email: Enter your business email address to be displayed to the payer during the payment interaction (e.g., a customer service email).
Phone: Enter your business phone number (up to 20 characters) to be displayed to the payer during the payment interaction.
Logo: Provide the URL of your business logo (JPEG, PNG, or SVG) to be displayed to the payer during the payment interaction.
The logo must be 140×140 pixels, and the URL must be secure (e.g., https://).
Logos exceeding 140 pixels will be automatically resized.
Merchant Information in Redirected Payment Page
Advanced Configuration
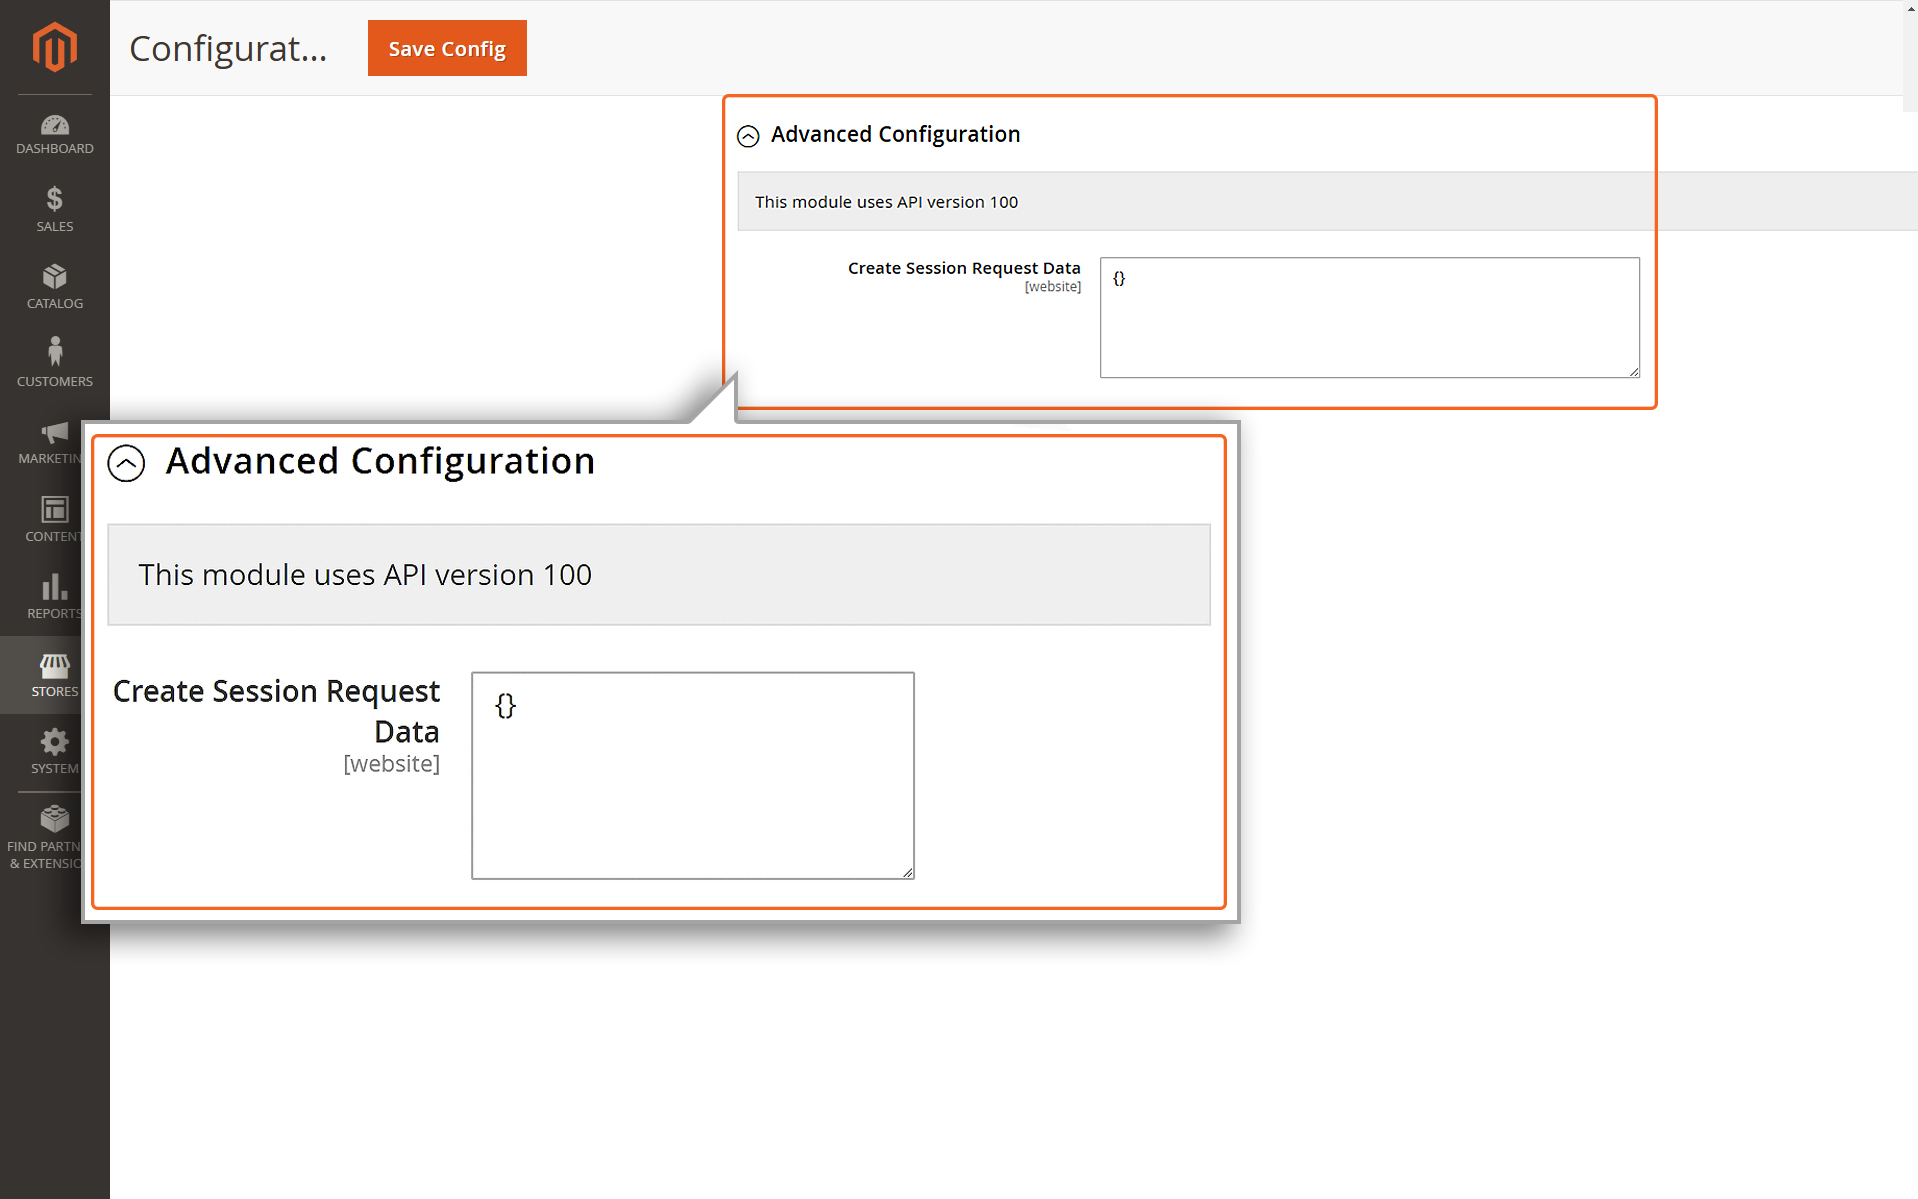
Advanced Configuration
In the Advanced configuration section, you can find information about the current API version utilized by the Mastercard Gateway plugin. Additionally, there is a field available to create session request data.
Finally, click the Save Config button to save the modifications made on the ‘Mastercard Gateway plugin Configuration’ page.